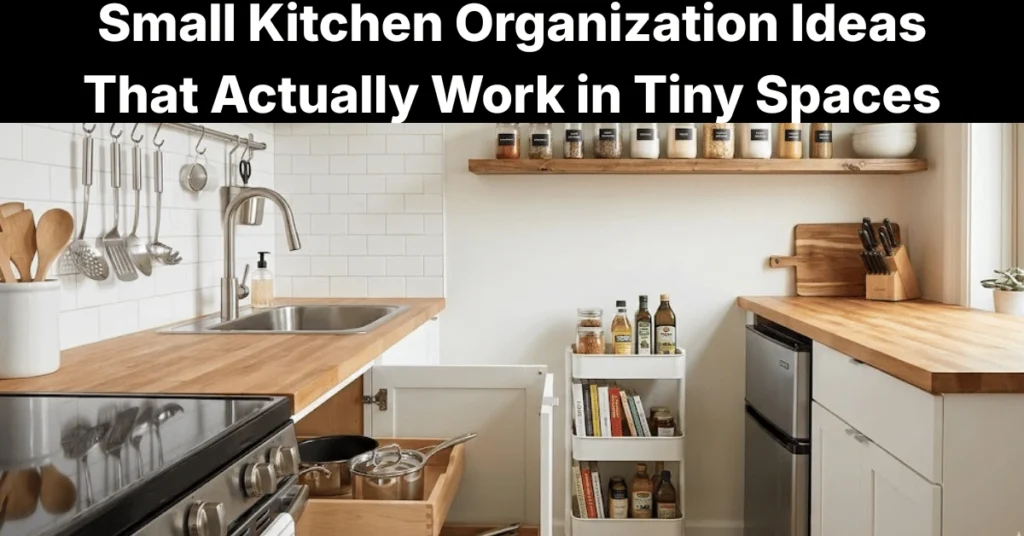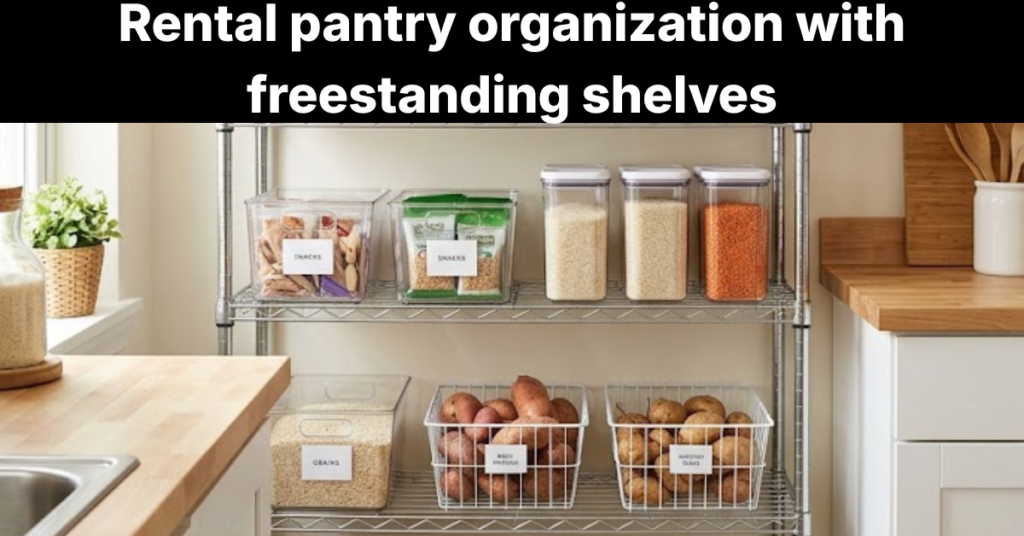
Small apartment kitchens average just 40–70 square feet of usable workspace [source: National Kitchen and Bath Association, 2023], yet cookware takes up more cabinet space than any other category. Effective pot and pan organization in a small kitchen relies on vertical storage, pull-out systems, and wall-mounted solutions that reclaim every inch — including overhead space, cabinet doors, and blind corners — without always requiring permanent modifications.
Small kitchen storage fails when cookware piles into one deep cabinet. Pots stack on pans. Lids slide everywhere. The right system depends on your cookware collection size, your cabinet layout, and whether you rent or own.
What are the most effective pot and pan organization ideas for small kitchens?
The most effective pot and pan organization ideas for small kitchens involve pull-out cabinet organizers, wall-mounted pegboards, and ceiling-mounted hanging racks that move cookware into vertical and overhead space instead of crowding floor-level shelves. These methods cut clutter and improve access inside kitchens under 100 square feet.
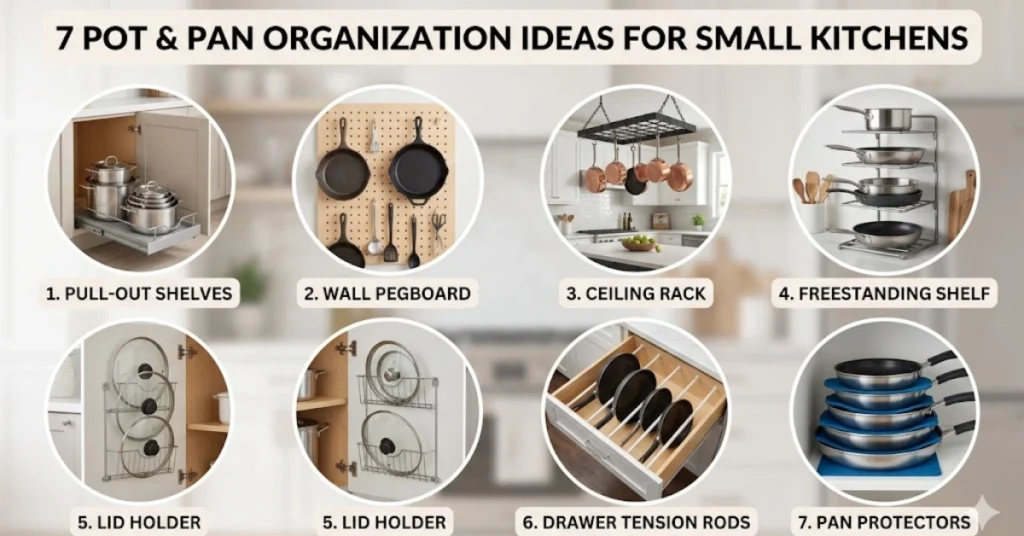
7 effective pot and pan organization ideas are listed below.
- Pull-out cabinet organizers — Deep slide-outs bring hidden cookware forward without digging through stacked pots.
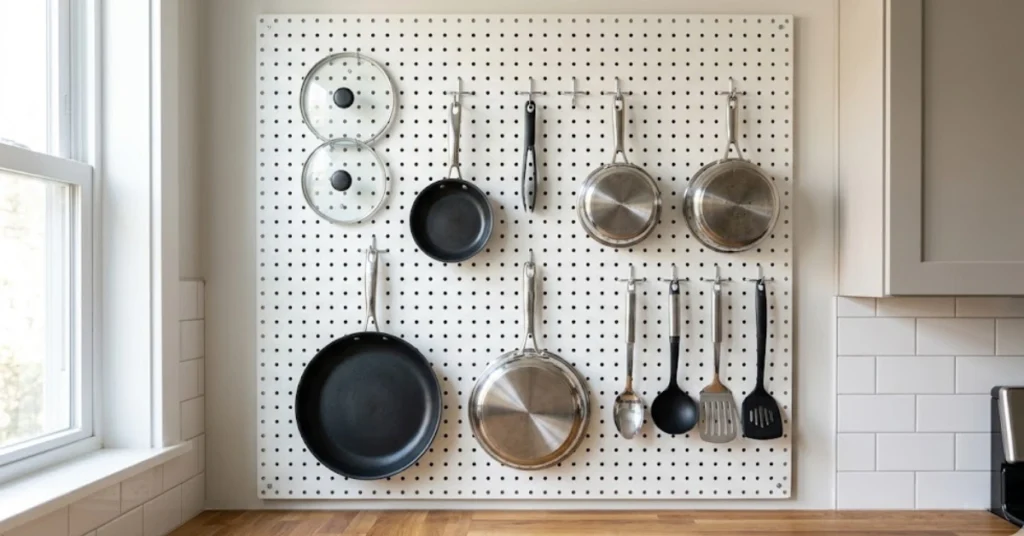
- Wall-mounted pegboards — Pegboards use open wall space to hang skillets, lids, and utensils within arm’s reach.
- Ceiling-mounted hanging racks — Overhead pot racks free every cabinet shelf for other storage.
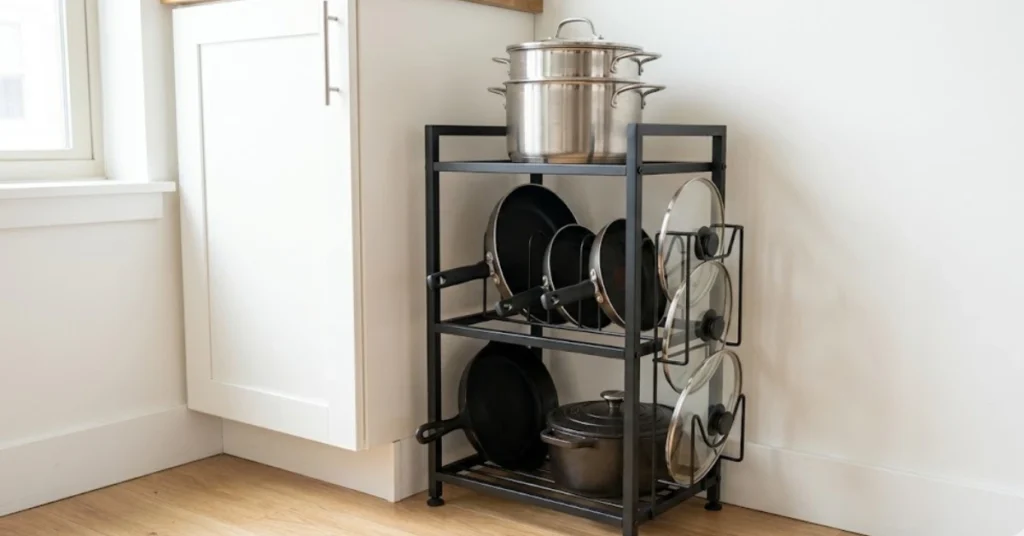
- Freestanding tiered shelving — Open metal racks sit on counters or floor corners with no drilling required.
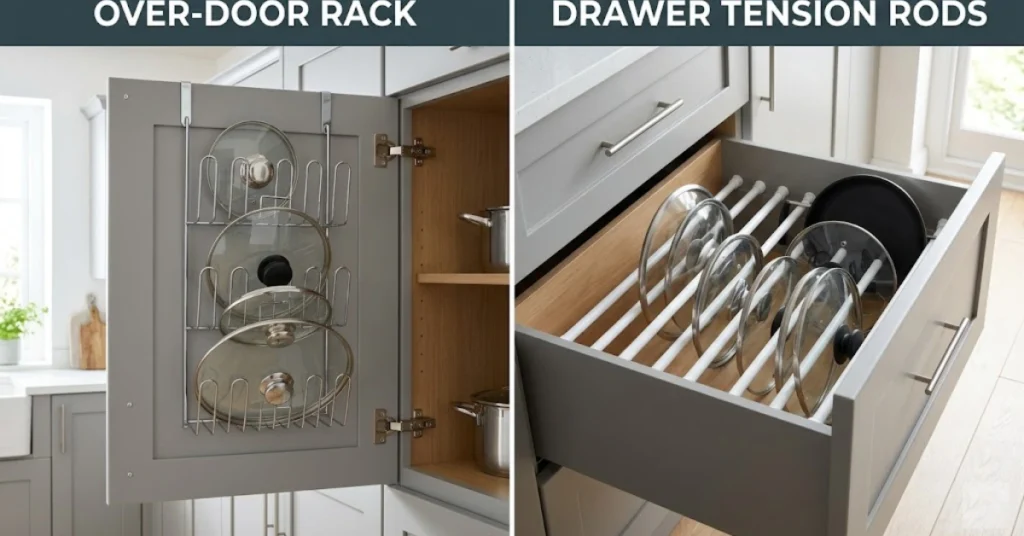
- Over-the-door lid racks — Wire organizers on cabinet door interiors store lids without wasting drawer space.
- Tension rod dividers — Installed inside deep drawers, tension rods hold lids upright and stop sliding.
- Felt pan protectors — Cushioned fabric discs stack between non-stick pans to block coating damage.
How do pull-out cabinet organizers improve pot and pan organization?
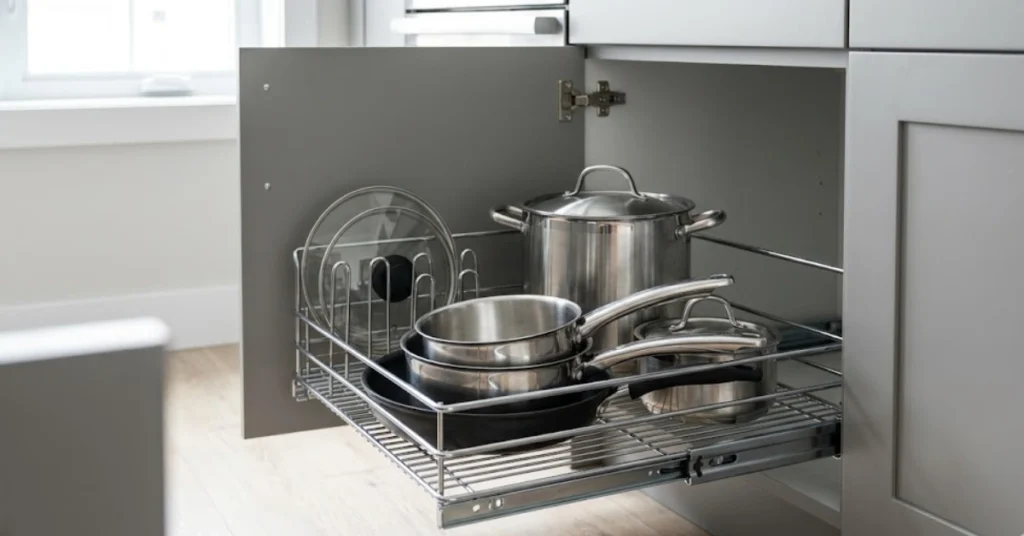
4 ways pull-out cabinet organizers improve storage are given below.
- Deep cabinet access improves because full-extension glides expose every stored pot without forcing you to reach into dark corners.
- Blind corner utilization increases when rotating corner pull-outs convert dead corner space into reachable cookware storage.
- Heavy-duty glides handle real weight — commercial-grade slides rated at 75–100 lbs support cast iron and stainless steel without bending.
- Stacking efficiency improves because flat pull-out shelves let you separate pot bodies from lids, ending the avalanche problem.
How does pegboard installation maximize vertical pot and pan organization?
5 steps to maximize vertical space with pegboard installation are given below.
- Choose 1/4-inch hardboard pegboard and mount it with 1-inch spacers to leave clearance behind the board for hook insertion.
- Use adjustable hooks rated for 5–10 lbs each so you can move frequently used skillets without removing old hardware.
- Plan a customized layout by tracing each pan’s outline on paper before drilling so hook positions match actual cookware shapes.
- Cover a 2 × 4 ft section — that surface holds 8–12 pieces of cookware and frees every cabinet shelf through wall space optimization.
- Group by frequency of use — everyday pans sit at eye level, heavier stock pots near the bottom to cut lifting strain.
Recommended Video: Search YouTube for “how to install a kitchen pegboard for pots and pans” to watch a step-by-step visual guide.
How do ceiling-mounted hanging racks streamline pot and pan organization?
4 reasons ceiling-mounted hanging racks streamline storage are outlined below.
- Freeing cabinet space — moving 6–10 pots overhead empties entire shelves, which then hold dry goods or small appliances instead.
- Overhead clearance requirements — racks need at least 7 feet of ceiling height to hang safely above counter level without creating a head hazard.
- Sturdy ceiling joists are non-negotiable — a fully loaded rack can exceed 50 lbs, so every anchor must go into solid wood joists, not drywall.
- S-hooks allow one-handed retrieval — open S-hooks let you pull a pan instantly, unlike closed hooks that require lifting and unhooking at the same time.
What factors determine the best system for pot and pan organization?
The best pot and pan organization system depends on three things: your cookware collection size, your available square footage, and your rental lease constraints.
A household with 4–6 pans and one stockpot fits a single pull-out shelf in a base cabinet. A household with 10+ pieces needs a combined approach — hang daily pans on a pegboard, store cast iron in a reinforced lower cabinet, keep lids on an over-the-door rack. One method rarely solves the whole problem.
Cabinet layout shapes every decision. Galley kitchens with 12–18 inches between counters limit overhead racks but support pegboards on end walls. L-shaped kitchens often have a blind corner cabinet — the worst storage spot in any kitchen — that a rotating pull-out solves directly.
Weight limits matter more than most people expect. Standard cabinet shelves hold 25–50 lbs. A complete cast iron set alone can weigh 40–60 lbs [source: American Cast Iron Cookware Association, 2024]. Exceeding that limit causes shelf bowing and hardware failure.
Frequency of use is the final filter. Organize by what you reach for every day, not by pan size.
| Factor | Low-Complexity Kitchen | High-Complexity Kitchen |
| Cookware count | 4–6 pieces | 10+ pieces |
| Best primary system | Pull-out shelf | Pegboard + pull-out combo |
| Lid storage | Tension rods in drawer | Over-the-door rack |
| Cast iron solution | Reinforced lower shelf | Dedicated base cabinet tier |
| Renter-safe option | Freestanding tiered rack | Freestanding + tension rods |
Why is lid management a major challenge for pot and pan organization?
Lid management is a major challenge for pot and pan organization because lids have awkward dimensions that no standard shelf or drawer handles cleanly. A round lid with a center knob cannot lie flat without tipping. It cannot stand upright without sliding. Mismatched sets produce a pile of different-diameter discs that refuse to stack in any logical way.
Most kitchen drawers sit 3–4 inches deep. A standard pot lid stands 2–3 inches tall at the knob. Lay it flat and it fills the drawer. Stand it upright and it falls into the next lid. Cluttered drawers are the direct result of forcing a 3-dimensional object into a storage system built for flat items.
Glass lids carry a shatter risk on top of that. When stacked directly without separators, one lid’s knob chips the glass of the next. This is especially true in apartments above busy streets where floor vibration is constant. Mismatched sets add a retrieval problem to the storage problem — a 10-inch lid that only fits one specific pan means searching through every lid to find the right one.
| Lid Problem | Root Cause | Best Fix |
| Tipping when upright | Center knob shifts balance point | Tension rods in drawer |
| Sliding in drawers | No vertical support structure | Wire rack organizer |
| Chipping glass | Stacking without cushion | Felt pad separators |
| Mismatched retrieval | No size-based grouping | Over-the-door rack with slots |
| Wasted drawer depth | Lids stored flat | Vertical upright storage |
Should you use over-the-door racks for lid management?
Yes — over-the-door racks are one of the most space-efficient lid solutions available for small kitchens.
4 benefits of using over-the-door racks for lids are listed below.
- Concealed storage keeps lid clutter off counters and out of sight the moment the cabinet door closes.
- Cabinet door interior space is dead space in most kitchens — a wire rack turns that unused surface into active, organized lid storage.
- Wire rack organizers with adjustable slots hold lids of different diameters upright, separated, and easy to pull with one hand.
- Easy retrieval improves because each lid sits in its own visible slot — no moving other items to get to the one you need.
Should you install tension rods inside drawers for lid management?
Yes — tension rods create adjustable vertical compartments inside deep drawers at almost no cost.
4 steps to install tension rods for lid management are given below.
- Measure drawer width exactly before buying — tension rods expand between 12 and 20 inches and must grip both side walls firmly without slipping.
- Space rods 2–3 inches apart to create vertical upright storage slots that fit standard pot lids ranging from 8 to 12 inches in diameter.
- Stand lids upright between the rods with knobs facing up — this deep drawer optimization fits 6–8 lids where 2 lids would otherwise lie flat.
- Test rod tension before loading by pressing down on each rod — preventing sliding starts with a firm grip on both walls, not a loose wedge fit.
Why are heavy cast iron skillets difficult for pot and pan organization?
Heavy cast iron skillets are difficult for pot and pan organization because a single 12-inch cast iron skillet weighs 8–12 lbs [source: Lodge Manufacturing, 2024] — and standard cabinet shelves are not built to handle that density when multiple pieces share one shelf.
Excessive weight distribution across a 3/4-inch particleboard shelf causes visible shelf bowing within months. A full set — skillet, Dutch oven, and grill pan — can total 30–40 lbs on one surface. That load strains the mounting hardware, pulls shelf pins loose, and risks a collapse that damages everything stored below.
Lifting ergonomics create a second problem. Pulling a 12-lb skillet from a top shelf or a deep lower cabinet with a bent-over posture is a real injury risk. Cast iron needs to live at countertop height — between 28 and 36 inches from the floor — for safe daily use.
Should you use reinforced lower shelving for heavy cast iron skillets?
Yes — reinforced lower shelving in base cabinets is the safest and most practical solution for cast iron storage.
4 reasons to use reinforced lower shelving for cast iron are given below.
- Base cabinets send weight directly to the floor, not to wall-mounted brackets, so the load path is structurally sound even at 50+ lbs.
- Weight capacity limits increase when you swap particleboard shelves for 3/4-inch solid plywood rated at 150+ lbs per linear foot [source: Wood Magazine, 2023].
- Sturdy wood tiers added inside a base cabinet create two separate levels — one for a Dutch oven, one for flat skillets — without wasting vertical cabinet height.
- Preventing cabinet damage means placing rubber feet or shelf liners under cast iron so the rough cookware bottom does not grind the wood surface on every use.
Why is scratch prevention critical for non-stick pot and pan organization?
Scratch prevention is critical for non-stick pot and pan organization because damaged coating contaminates food and forces early pan replacement at a cost of $30–$150 per piece.
Non-stick coatings — whether PTFE (polytetrafluoroethylene, commonly called Teflon) or ceramic — fail at contact points first. Metal-on-metal friction from stacking a bare stainless pan directly onto a non-stick surface leaves micro-scratches after the first few uses. Those scratches grow. The coating flakes. Ruined cookware longevity means a $60 pan lasts 6 months instead of 3–5 years.
The U.S. Food and Drug Administration notes that physically degraded coatings raise concerns separate from intact PTFE [source: FDA, 2023]. Good storage stops that mechanical degradation before it starts.
Should you use felt pan protectors for scratch prevention?
Yes — felt pan protectors are the lowest-cost, highest-return fix for non-stick cookware storage.
4 advantages of using felt pan protectors are outlined below.
- Cushioned barriers between pans absorb impact and block direct metal-to-metal contact during stacking, removing the main cause of coating damage.
- Safe nesting allows space efficiency — with protectors in place, 4–6 non-stick pans stack in a single pull-out shelf without their surfaces ever touching.
- Extending lifespan from under 1 year to 3–5 years is realistic when pans are stored with felt separators and never dragged against bare cookware.
- Inexpensive investment — a 10-pack of 10-inch round felt protectors costs $6–$12, making them the cheapest form of cookware protection in any kitchen.
Why are renter restrictions an obstacle for pot and pan organization?
Renter restrictions are an obstacle for pot and pan organization because most lease agreements ban wall drilling, ceiling anchors, and any permanent hardware modifications — which are exactly what the highest-capacity cookware storage systems require.
Installing a pegboard means screwing into wall studs. Mounting a ceiling pot rack means drilling into joists. Both create holes that landlords classify as damage under standard no-drill clauses, triggering security deposit deductions at move-out. In cities like New York and San Francisco, unauthorized modifications result in deductions ranging from $500 to $2,000 [source: Nolo Legal Encyclopedia, 2024].
This rules out the two best-performing systems for an estimated 44 million U.S. renters [source: U.S. Census Bureau, 2023]. The practical answer is a system built entirely from freestanding and tension-based components — no landlord approval needed, zero permanent marks left behind.
Should you use freestanding tiered racks to bypass renter restrictions?
Yes — freestanding tiered racks need no hardware, no drilling, and no landlord approval.
4 ways freestanding tiered racks bypass renter restrictions are given below.
- Corner floor space becomes active storage — a 3-tier rack fits in a 12 × 12-inch corner, stacking pots vertically without touching any wall surface.
- No hardware required means the rack sits on rubber feet, leaving zero marks on flooring or walls when removed at move-out.
- Portable organization lets you reposition the rack during cooking and take it with you when you relocate — no piece of it belongs to the apartment.
- Stacking pots vertically on tiered shelves cuts the floor footprint by 60–70% compared to laying pots flat in a cabinet, freeing cabinet space for food storage.
What are the common mistakes to avoid with pot and pan organization?
The common mistakes to avoid with pot and pan organization are ignoring vertical space, overcrowding shelves, and stacking without protection — all of which make cookware harder to reach and faster to ruin.
6 common mistakes to avoid with pot and pan organization are listed below.
- Ignoring vertical space — most small kitchens have 18–36 inches of open wall above counters that sit empty while cabinet shelves overflow.
- Overcrowding single shelves — loading one shelf with 8+ pans creates an unstable pile where pulling one piece knocks over several others.
- Nesting without protectors — stacking bare non-stick pans directly on top of each other scratches the coating within weeks of first use.
- Burying frequently used pans — placing daily-use skillets behind or below rarely used stockpots adds minutes of retrieval friction to every cooking session.
- Storing lids with pans — mixing lids into the same space as pots creates a pile with no logic, turning every cooking session into a search operation.
- Skipping reinforcement on heavy shelves — leaving cast iron on a standard particleboard shelf risks bowing, pulled hardware, and eventual shelf collapse.
Small kitchen storage problems compound fast. One mistake stacks on the next until the entire system breaks down. Fix your most-used access point first — whatever you pull out every day — then build the rest of the system outward from there. Pot and pan organization in small kitchens holds together when it starts with use patterns, not with aesthetics.

Mike Mann writes practical home organization and small-space living guides for CozySorted. His work focuses on apartment-friendly storage, clutter-free routines, bedroom organization, and simple systems that help renters, apartment dwellers, and small-space homeowners create calmer, easier-to-maintain homes.