Home Organization & Budget Decor: The Complete Guide for Small Spaces and Renters
Americans spend an average of 2.5 days per year searching for misplaced items, a number that climbs sharply in homes under 800 square feet [site: U.S. Bureau of Labor Statistics, American Time Use Survey]. Renters in small apartments face a compounded problem: limited square footage, landlord restrictions, and zero permanent storage infrastructure. This guide solves all three simultaneously.
The system covered here moves through three sequential stages: Declutter, Organize, Decorate. It covers every room, every renter constraint, and every budget tier from $0 DIY solutions to premium modular systems. Home cooks with cluttered kitchens, renters protecting security deposits, couples sharing 400 square feet, and anyone whose current system stopped working will find a complete, actionable framework here.
What Makes Home Organization Different for Small Spaces and Renters?
Home organization for small spaces and renters is a constrained system design problem that requires solving for three variables simultaneously: limited square footage, no permanent structural modifications, and the legal restrictions that come with a lease agreement. Standard homeowner organization advice assumes wall anchoring, built-in cabinetry, and unlimited vertical access. None of those assumptions apply here.
Renters operate under a fundamentally different ruleset. Every storage solution must be removable, damage-free, and reversible. Every organizational decision must account for square footage that cannot be expanded. The Declutter-Organize-Decorate framework addresses these constraints in the correct order, preventing the two most common renter mistakes: buying organizers before auditing what needs to be stored, and decorating surfaces that are functionally broken.
Why Does Renter Status Change Every Organization Decision You Make?
Renter status changes every organization decision because lease agreements legally prohibit permanent modifications to walls, floors, ceilings, and cabinetry in most residential tenancy contracts. Drilling a single screw into a wall without landlord approval can forfeit a security deposit that averages one to two months’ rent [site: National Multifamily Housing Council, 2023].
This legal constraint filters every product choice. A wall-mounted pegboard that costs $25 becomes ineligible. A freestanding pegboard that costs $45 becomes the correct answer. Command strips, tension rods, and adhesive-backed hooks replace screws as the foundational installation toolkit for renters. The constraint is not inconvenient. It is the organizing principle that determines every downstream decision.
Landlord approval requirements vary by jurisdiction. In most U.S. states, tenants must restore the unit to its original condition at move-out, meaning any modification carries a reversal cost [site: HUD.gov, tenant rights guidelines]. Damage-free storage solutions eliminate that cost entirely.
How Do Small Space Constraints Require a Different System Than Standard Homes?
Small space constraints require a different system because floor space scarcity makes vertical storage, multi-use furniture, and visual density management the primary levers, not the secondary ones. Standard home organization assumes horizontal expansion: more shelving units, more cabinets, more room in the garage. Small spaces offer none of that.
In apartments under 600 square feet, every item on the floor represents a trade-off against usable living area. A freestanding bookshelf that consumes 2 square feet of floor space must justify its footprint by providing 5 to 7 vertical feet of storage return. Under-bed storage, over-door solutions, and multi-use furniture that doubles as storage all serve the same function: recovering usable space from areas that standard homes leave empty or single-purpose.
Small space always looks more organized when vertical surfaces do more work than horizontal surfaces. That principle drives every product recommendation in this guide.
What Is the Declutter-Organize-Decorate Framework and Why Does Order Matter?
The Declutter-Organize-Decorate framework works because each stage removes a false problem that would otherwise be solved with money instead of logic. Organizing before decluttering means buying containers for items that should have been discarded. Decorating before organizing means styling surfaces that are functionally broken.
Declutter first: audit every category and remove items that are broken, duplicated, expired, or unused in 6-plus months. Organize second: assign every remaining item a fixed home using damage-free storage systems sized to actual content volume. Decorate third: add visual personality only after the functional system is stable.
Skipping the declutter stage is the single most expensive mistake in small space organization. According to professional organizer research, 80% of clutter in the average home consists of items that are never used [site: NAPO, professional organizer surveys, 2022]. Organizing those items costs money. Removing them costs nothing.
How Do You Declutter a Small Home Before Organizing?
Decluttering a small home before organizing requires working category by category rather than room by room, removing every item in a category from its storage location before evaluating what stays. This prevents the common error of organizing clutter into tidier clutter.
5 steps to declutter a small home before organizing are listed below.
- Empty one category completely before evaluating any item. Pull all clothing, all kitchen tools, or all books into one visible pile before deciding what leaves.
- Apply a use-frequency test to every item: used in the last 30 days stays, used in the last 6 months goes to secondary storage, unused beyond 6 months leaves the home.
- Create three physical destinations immediately: a discard bag, a donate box, and a relocate pile for items belonging in other rooms.
- Process the discard and donate containers the same day they are filled. Items staged for donation that remain in the home for more than 48 hours have a high probability of being reclaimed.
- Photograph sentimental items before releasing them. A digital archive requires zero physical storage and eliminates the guilt that prevents most declutter sessions from completing.
What Is the Fastest Way to Declutter When You Feel Overwhelmed?
The fastest way to declutter when you feel overwhelmed is the 15-minute timed zone method: set a timer, pick one surface or one drawer, and work only within that boundary until the timer stops. The constraint eliminates paralysis by removing the need to decide where to start.
Do not attempt to declutter the entire apartment in a single session. The cognitive load of evaluating thousands of items produces decision fatigue within 45 to 60 minutes, after which discard rates drop significantly [site: Journal of Consumer Psychology, decision fatigue research]. Small wins compound. One cleared drawer creates visible momentum that sustains the next session.
Start with the area that generates the most daily friction. If the entryway creates stress every time you walk in, start there. If the kitchen counter makes cooking harder, start there. The location with the highest daily impact creates the highest daily reward when it is cleared.
Which Room Should You Declutter First in a Small Apartment?
The best room to declutter first in a small apartment is the bedroom, because sleep quality and morning routine friction are directly affected by visual clutter density in the room where the day begins and ends [site: Sleep Foundation, sleep environment research, 2023].
A room-by-room declutter order with brief reasoning for each:
- Bedroom first — clothing and bedside clutter create morning decision fatigue; clearing this room produces immediate daily benefit.
- Kitchen second — expired food, duplicate tools, and unused appliances consume the highest proportion of limited small-kitchen storage; clearing this unlocks functional cooking space.
- Bathroom third — expired products, duplicate toiletries, and unused skincare take 30 to 45 minutes to audit; the fast win sustains momentum.
- Living room fourth — shared surfaces accumulate the most category-diverse clutter; it requires the longest session and benefits from the discipline built in earlier rooms.
- Entryway last — after all rooms are complete, the entryway receives overflow items correctly reassigned to their proper locations elsewhere.
How Does the KonMari Method Work for Renters With Limited Storage?
The KonMari method works for renters by applying a category-based declutter sequence (clothes, books, papers, komono, sentimental) that forces a complete audit of every item in a category before any organizational system is purchased or installed. Developed by Marie Kondo and documented in “The Life-Changing Magic of Tidying Up,” the method uses the question “Does this spark joy?” as the discard filter.
For renters with limited storage, the method’s greatest value is its insistence on volume reduction before storage design. A renter with a 36-inch (91 cm) closet and 200 garments does not have a storage problem. The method surfaces that reality immediately.
The limitation is relevant. Long-term testing however shows that the spark joy criterion underperforms for renters who share space with partners or children, where functional necessity overrides personal emotional response to objects. In shared small spaces, a use-frequency test often produces more actionable decisions than a joy-based filter.
What Is the 12-12-12 Decluttering Method for Small Spaces?
The 12-12-12 decluttering method is a structured challenge that requires finding 12 items to throw away, 12 items to donate, and 12 items to return to their correct location in a single session. The fixed numbers create a goal that is specific enough to start and achievable enough to finish in under 30 minutes.
This method works in small spaces because it produces 36 decisions per session without requiring a full-room commitment. A studio apartment occupant can run this challenge daily for one week and process 252 objects without a single overwhelming declutter session. The donate and discard totals create measurable volume reduction in days rather than weekends.
The 12-12-12 challenge pairs well with the 15-minute timer method. Together, they transform decluttering from an event into a daily practice that prevents clutter accumulation rather than responding to it.
How Do You Let Go of Sentimental Items Without Guilt?
Releasing sentimental items without guilt requires separating the memory from the object before making any discard decision. The memory is permanent. The object is its container. When the container is removed, the memory remains.
5 practical strategies for releasing sentimental clutter:
- Photograph every sentimental item before donating it — a digital image stored in a Google Photos album or a dedicated cloud folder preserves the visual record without occupying physical space.
- Limit sentimental storage to one defined container — one lidded bin, one memory box. When the box is full, a new item can only enter when an existing item leaves.
- Reframe donation as redistribution — an item donated to a thrift store or gifted to a family member continues to be used rather than stored unused in a box.
- Set a decision deadline of 30 days — place borderline sentimental items in a labeled box. If they have not been retrieved or thought about in 30 days, the attachment is not active enough to justify the storage cost.
- Distinguish between items that hold memory and items that hold obligation — gifts kept out of guilt rather than genuine attachment belong in the donation box, not the memory box.
How Do You Organize a Small Bedroom Without Drilling Into Walls?
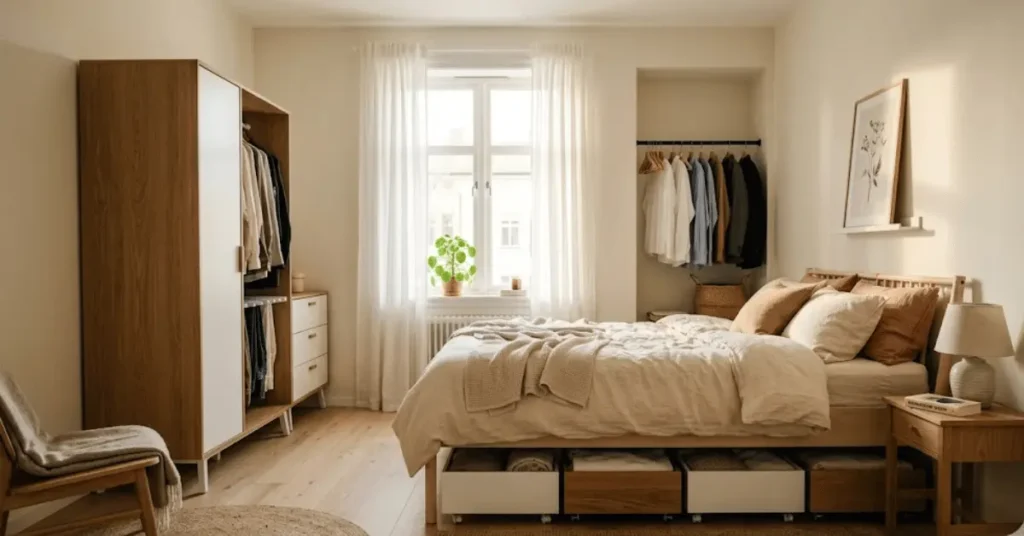
Organizing a small bedroom without drilling into walls requires building a storage system from four categories: under-bed space, closet interior, vertical freestanding units, and over-door capacity. None of these require wall penetration. Together, they recover more storage than most renters realize the bedroom contains.
The system works regardless of room size. A bedroom under 150 square feet (14 square meters) still has a bed frame with clearance underneath, a closet with unused vertical space, a door with accessible back surface, and unused air space between the top of the wardrobe and the ceiling. For a deeper look at room-specific approaches, our guide on small bedroom ideas for renters covers layout strategies and product picks tailored to the most common rental floor plans.
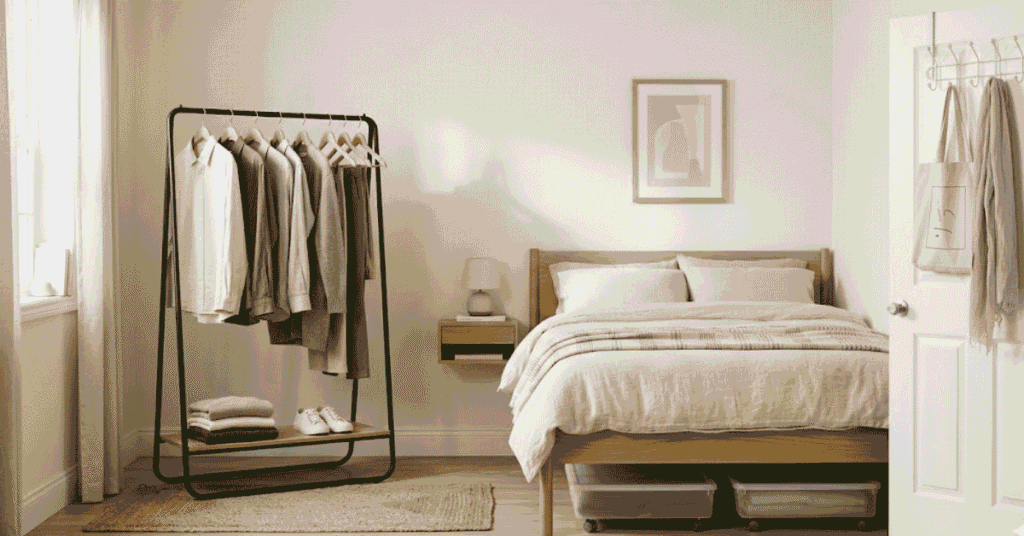
What Are the Best Damage-Free Storage Solutions for Bedrooms?
The best damage-free storage solutions for bedrooms include freestanding shelving units, Command hooks, and over-door organizers that require no wall anchoring, no adhesive removal risk, and no landlord approval.
8 damage-free bedroom storage solutions are listed below.
- Freestanding wardrobe or clothing rack — a metal garment rack with shelves holds 40 to 60 garments and assembles without tools; costs $35 to $150 depending on depth and shelf count.
- Command hooks (3M) — rated for 0.5 to 7.5 pounds (225 g to 3.4 kg) per hook; removable without wall damage; used for bags, hats, belts, jewelry, and baseball caps on wall surfaces.
- Over-door hook rack (Yamazaki Home door rack) — hangs over any standard door without screws; holds 6 to 8 hooks; the sleek low profile hanger design prevents door clearance issues.
- Under-bed flat storage bins — roll-out bins with lids store seasonal clothing, extra linens, and shoes in the dead space beneath the bed frame.
- Tension rod shelf dividers — spring-loaded rods placed vertically between existing shelves create individual vertical compartments for organizing socks, underwear, and base layers.
- Stackable cube organizers (IKEA Kallax or similar) — freestanding, modular, and repositionable; a 2×4 cube unit provides 8 compartments in 58 x 149 cm (23 x 58 inches) of floor footprint.
- Pegboard panel on a freestanding frame — provides adjustable hook storage for accessories without touching a wall surface.
- Over-door mirror with interior storage — combines a full-length mirror with a concealed jewelry and accessory compartment; no wall mounting required.
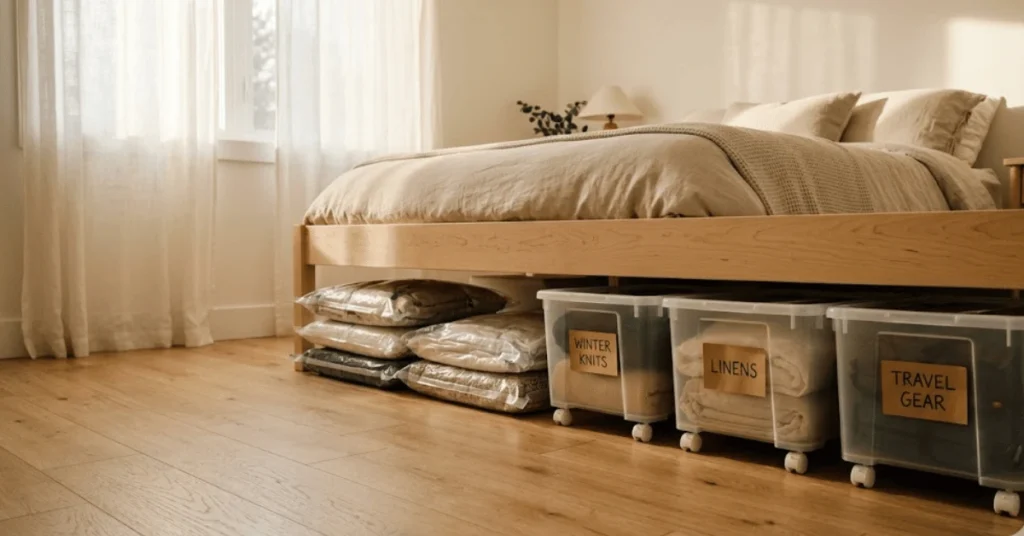
How Do You Maximize Under-Bed Storage in a Small Space?
The best way to maximize under-bed storage is measuring the clearance height before purchasing any container, standard bed frames provide 6 to 12 inches (15 to 30 cm) of clearance, and a bin purchased without measuring will not fit. Our dedicated guide on under-bed storage ideas walks through the best products for every clearance height, including rolling drawers, vacuum bags, and lidded bins with casters.
Items that belong under the bed: off-season clothing, extra bedding sets, shoes in their original boxes or clear containers, luggage, and flat holiday items. These are all low-frequency items that do not need daily accessibility.
Storage formats by clearance height:
- 6 inches or less: vacuum storage bags compress bulky items like comforters and sweaters to 1 to 2 inches of height; one queen comforter compresses to 4 inches.
- 7 to 10 inches: flat rolling drawers on casters provide easy retrieval without lifting the bed skirt; the sturdy stackable storage from Iris USA includes rolling flat bins sized for this clearance range.
- 10 inches or more: lidded under-bed bins with wheels offer the most capacity; the Container Store offers bins in this range with 360-degree caster wheels for full-extension retrieval.
Bed risers increase clearance by 3 to 6 inches (7.5 to 15 cm) and cost $10 to $25. They convert low-clearance frames into high-capacity under-bed zones without structural modification.
How Do You Organize a Small Closet Without a Dresser?
Organizing a small closet without a dresser requires replacing horizontal drawer storage with three internal closet zones: a hanging zone, a shelf zone, and a floor zone. Each zone handles a clothing category that a dresser would otherwise hold. If you are working with a particularly tight reach-in closet, the full breakdown in our guide to organizing a small closet without a dresser covers double hang rods, shelf dividers, and floor zone shoe systems in detail.
The hanging zone handles garments that wrinkle easily, like dresses, blouses, and skirts. Use a double hang rod to convert single-height hanging into two rows; the lower rod handles shorter garments while the upper rod handles full-length items. For items like denim, sweaters, and t-shirts that fold well, shelf zone storage with vertical shelf dividers creates individual stacks that do not topple.
Organizing socks, underwear, and base layers in the shelf zone requires a drawer-substitute solution. Small open-top bins or fabric drawer inserts placed on the shelf replicate drawer function exactly. Items like belts, jewelry, and baseball caps go on the back of the closet door using a door rack or a Yamazaki Home over-door organizer, freeing shelf space for folded clothing.
The floor zone stores shoes in a clear stackable shoe box system or a freestanding shoe rack, keeping the floor visible and accessible without sacrificing footwear organization.
What Vertical Storage Options Work Without Wall Damage?
Vertical storage options that require no wall damage include freestanding floor-to-ceiling units and over-door organizers that use weight and tension rather than fasteners to maintain position.
- Tall freestanding bookshelves (IKEA Billy, Amazon Basics 5-shelf): extend from floor to 79 inches (200 cm); no anchoring required for units under 100 lbs (45 kg) when placed against a wall.
- Tension pole organizers: spring-loaded poles extend between floor and ceiling; hold shelves, baskets, or hooks up to 50 lbs (22 kg) combined; removable without ceiling damage.
- Over-door shoe organizers: hold 24 to 36 pairs in a vertical column using a single over-door hook bar; zero floor footprint.
- Freestanding ladder shelves: lean against the wall without anchoring; hold 4 to 5 shelves; ideal for bedside tables and reading corner storage.
- Stackable cube storage units: build vertically up to 5 cubes high with interlocking connectors; no wall contact required.
How Do You Share a Small Bedroom With Another Person Efficiently?
Sharing a small bedroom efficiently requires a zone-separation system that assigns each person autonomous storage territory rather than shared access to every drawer, shelf, and closet section. Shared access without zone assignment produces the most common small-space conflict: one person’s items occupying the other person’s storage.
Divide the closet into two equal halves using a center shelf or a visual marker. Each person’s hanging section, shelf section, and floor section stays within their half. Assign drawers by person rather than by category: Person A owns drawers 1 and 2; Person B owns drawers 3 and 4. This eliminates the daily friction of searching through a shared system.
For nightstands, the rule is simple. Each person’s side of the bed owns one surface and one charging location. Tables, side tables, and nightstands on each side of the bed belong exclusively to the person sleeping adjacent. Smart small space design treats zone ownership as non-negotiable — it is what prevents a functional system from degrading into a shared pile. More layout ideas for shared rooms are covered in the small bedroom ideas for renters guide, including furniture arrangements that carve out personal zones in rooms under 180 square feet.
How Do You Organize a Small Kitchen in a Rental Apartment?
Organizing a small kitchen in a rental apartment requires treating the five problem areas as independent systems: counter surfaces, pantry absence, under-sink space, refrigerator interior, and cabinet depth. Each responds to a different organizational solution, and solving one does not automatically improve the others.
Rental kitchens average 70 to 100 square feet (6.5 to 9.3 square meters) in U.S. apartments, compared to 150 to 175 square feet in owned homes [site: American Institute of Architects, home design trends report]. That gap requires every counter inch and cabinet shelf to carry more functional weight than in a standard kitchen.
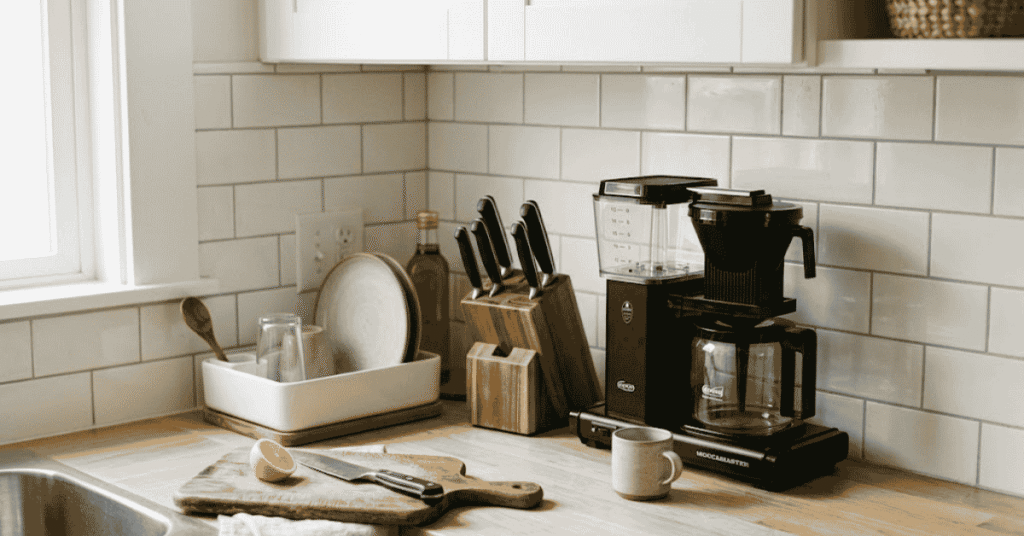
What Should Stay on the Counter in a Small Kitchen?
The items that should stay on a small kitchen counter are daily-use appliances and tools accessed at least once every 24 hours. Everything else belongs in a cabinet, a drawer, or a donation box.
Items that earn counter space:
- Coffee maker or electric kettle: used every morning; retrieval cost of storing it in a cabinet exceeds the counter space it occupies.
- Knife block or magnetic knife strip: daily prep tools that require immediate access without opening a drawer.
- Dish drying rack: a functional wet zone that must remain accessible during and after every meal.
- A single small cutting board: if cooking happens daily, the cutting board retrieval cycle justifies a permanent counter position.
Items that do not earn counter space: bread makers used weekly, stand mixers used monthly, decorative fruit bowls holding non-daily fruit, and appliances that require setup before use. These belong in cabinets. A small kitchen counter cleared to its functional minimum feels 30 to 40% larger than a counter that holds everything simultaneously [site: National Kitchen and Bath Association, counter organization studies].
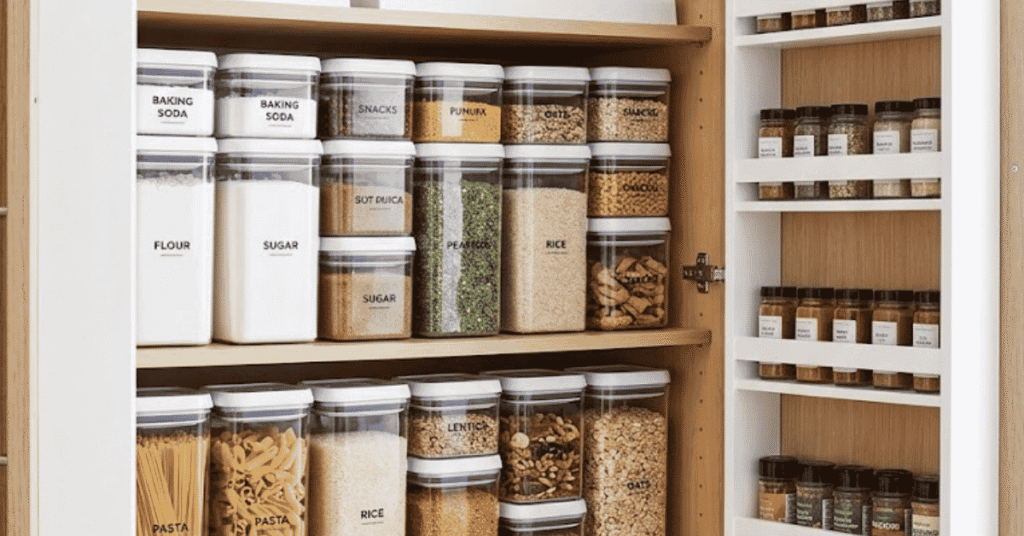
How Do You Create a Pantry System Without a Pantry?
Creating a pantry system without a pantry involves assigning a dedicated cabinet, freestanding shelf unit, or over-door organizer to food storage exclusively and treating that zone with the same category discipline a built-in pantry would use.
Steps to build a no-pantry system:
- Audit cabinet contents first — remove everything non-food from the largest available cabinet to create a dedicated food zone.
- Assign shelf levels by access frequency — daily staples on middle shelves at eye level, weekly items above, rarely accessed items on the highest shelf.
- Add a freestanding pantry unit (IKEA Brimnes, Sauder storage cabinet) if cabinet space is insufficient; a unit 12 inches (30 cm) deep and 72 inches (183 cm) tall adds 18 to 24 square feet of vertical storage in 4.8 square feet of floor space.
- Install an over-door pantry organizer on the inside of the kitchen cabinet door; a 6-tier door rack holds 30 to 40 small items in the dead space behind the door.
- Use clear labeled bins (OXO POP containers, Rubbermaid Brilliance) to contain loose dry goods; clear containers reduce search time and prevent duplicate purchasing.
- Label every shelf section so every household member maintains the system without instruction.
What Are the Best Under-Sink Storage Solutions Without Drilling?
The best no-drill under-sink kitchen storage solutions include tension rods and stackable bins that work around the pipe configuration rather than requiring cabinet modification.
8 no-drill under-sink storage solutions are listed below.
- Tension rod horizontal bar: installed at the rear of the cabinet, a tension rod lets you hang spray bottles from their trigger handles, freeing the floor of the cabinet entirely.
- Stackable clear bins (mDesign or Madesmart): stack vertically on either side of the pipe column; label by cleaning category.
- Pull-out two-tier sliding shelf: a freestanding unit that slides on its own base; no mounting required; holds 20 to 30 lbs (9 to 13 kg).
- Adjustable expandable shelf insert: a raised platform shelf that clears pipe obstructions; creates a usable upper tier in the cabinet without drilling.
- Door-mounted caddy with over-cabinet-door hooks: hangs on the inside of the under-sink cabinet door; holds sponges, scrubbers, gloves, and small bottles.
- Tension-mounted cabinet organizer: spring-tension legs press against the cabinet walls; no screws; holds up to 25 lbs.
- Magazine file holders: repurposed as vertical organizers for plastic wrap, foil, and parchment paper rolls laid horizontally.
- Lazy Susan turntable: placed on the cabinet floor; rotates 360 degrees for full access to items stored at the back of the cabinet.
Which Budget Kitchen Organization Products Work Best?
The budget kitchen organization products that deliver the most value are clear stackable bins, expandable drawer dividers, and lazy Susan turntables — three products that solve the highest-volume kitchen storage problems at the lowest cost across all budget tiers.
Dollar store options (under $3): magazine holders for foil and wrap storage, small bins for drawer organization, adhesive hooks for hanging cookware and oven mitts inside cabinet doors. These perform adequately for lightweight applications but warp under moisture or sustained weight.
Amazon mid-range options ($8 to $20): OXO Good Grips expandable drawer organizer, mDesign under-sink bins, SimpleHouseware freestanding can rack. These carry institutional testing validation and withstand 3 to 5 years of daily use.
IKEA options ($5 to $35): VARIERA shelf insert, GREJIG shoe organizer repurposed for cutting boards, GRUNDTAL magnetic knife rail. IKEA products consistently outperform their price point in kitchen applications due to the company’s kitchen-focused design heritage. Spending more pays off in drawer inserts and shelf risers. It does not pay off in basic bins or tension rods, where dollar store equivalents perform identically.
How Do You Organize a Small Fridge Efficiently?
Organizing a small fridge efficiently starts with assigning a fixed zone to each food category and purchasing bins sized to those zones before placing any food inside. Zone assignment without bins creates a system that collapses within 72 hours.
Fridge zone system by shelf:
- Top shelf: ready-to-eat foods, leftovers, and drinks — items consumed without cooking that benefit from maximum visibility.
- Middle shelf: dairy, eggs, and deli items — moderate-frequency items stored at the consistent 35 to 38°F (1.7 to 3.3°C) temperature zone [site: FDA, food safety storage guidelines].
- Bottom shelf: raw meat and fish in sealed containers — lowest shelf by food safety requirement; juices from raw proteins drip down, not up.
- Crisper drawers: designated for produce; one drawer for vegetables (low humidity), one for fruit (high humidity) where drawer controls allow adjustment.
- Door shelves: condiments, juices, and items that tolerate temperature variation — the door is the warmest fridge zone.
Clear stackable bins (Vtopmart, Bino) create retrievable sections within each shelf zone. A bin per category means the whole bin comes forward rather than individual items being shifted.
What Are the Best Spice Storage Ideas for Small Cabinets?
The best spice storage ideas for small cabinets are drawer inserts and tiered shelf risers — both recover dead space inside the cabinet without adding footprint outside it.
- Drawer spice insert (Joseph Joseph DrawerStore): angled rows display spice labels face-up; holds 20 to 30 jars in a single drawer; converts an otherwise inefficient drawer into a fully visible spice inventory.
- Tiered cabinet shelf riser (SimpleHouseware 3-tier): stacks spice jars vertically inside the cabinet; the back row elevates above the front row for full label visibility; costs $12 to $18.
- Cabinet door spice rack (Rev-A-Shelf or Command-strip mounted): mounts on the interior of a cabinet door; holds 18 to 24 standard spice jars; removes with Command strips without door damage.
- Wall-mounted magnetic spice strip: a magnetic bar mounted at backsplash height holds round magnetic-base tins; works in kitchens where the landlord permits adhesive strip use and where counter space is at a premium.
How Do You Organize a Small Living Room With No Built-In Storage?
Organizing a small living room with no built-in storage requires solving three problems simultaneously: creating functional zones within an open-plan space, selecting furniture that stores while it serves, and containing shared household items that accumulate without a designated home. Solving one without the others produces a partially organized room that breaks down within weeks.
The living room is the hardest room in a small apartment to organize because it carries the most competing functions. It is simultaneously a seating area, a work space, a media room, a guest space, and in many apartments, a toy zone. Smart small space design assigns each function a boundary and uses double duty furniture to hold storage within that boundary.
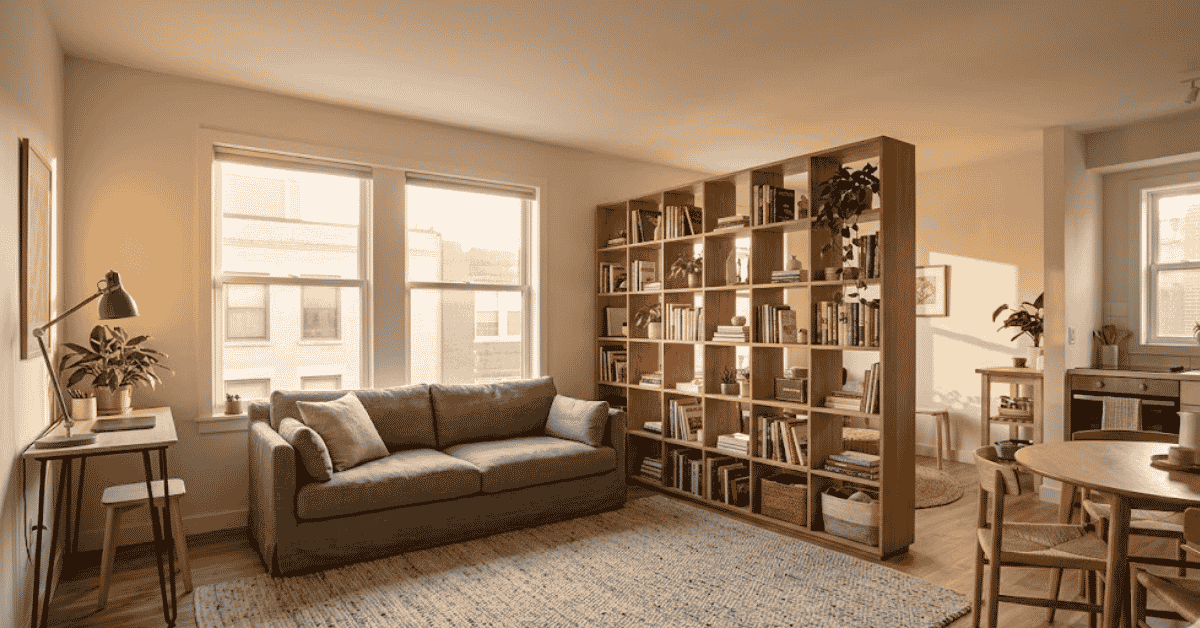
How Do You Zone a Small Living Room for Multiple Uses?
Zoning a small living room for multiple uses requires using furniture placement and area rugs as physical boundaries rather than walls, since no additional walls exist in an open-plan rental. Each zone functions independently and visually reads as its own space.
Assign three zones: a seating zone anchored by a sofa and area rug, a work zone defined by a desk surface and task lighting, and a storage zone built from shelving units or a media console. The area rug under the seating zone is the most powerful zoning tool available without permanent modification. A rug that is too small dissolves zone identity. A rug sized to contain the full sofa and coffee table creates a defined territory that signals “this is the sitting area” without a single wall divider [site: American Society of Interior Designers, small space guidelines].
A bookshelf placed perpendicular to the wall as a room divider creates a visual boundary between the seating zone and the work zone while adding 6 to 8 shelves of storage. No drilling required. The bookshelf’s own weight holds it in position.
How Do You Create a Functional Entryway in a Small Apartment?
Creating a functional entryway in a small apartment means building the four functions of an entryway (coat storage, shoe storage, key storage, bag drop) into a 12 to 24 inch footprint using freestanding furniture and over-door hooks where no dedicated hallway exists.
A narrow console table (10 to 14 inches deep, 30 to 36 inches wide) anchors the entryway zone near the front door. A small storage bench (18 inches deep) below it handles shoes and doubles as a surface for sitting while removing footwear. Over-door hook racks on the back of the front door — options from Yamazaki Home and similar brands in this door rack category — handle coats, bags, and umbrellas without consuming wall space. A small wall-mounted key hook using Command strips completes the system.
The entryway zone works without any of these requiring permanent installation. The entire setup removes in 20 minutes at move-out.
Which Storage Furniture Pieces Are Worth It?
The storage furniture pieces worth buying for a small living room are those that perform two functions simultaneously — one visible function (seating, displaying, containing) and one storage function (holding, organizing, concealing).
- Storage ottoman (IKEA Kallax with cushion top, West Elm Lodge Ottoman): provides seating, a coffee table surface, and interior storage for blankets, pillows, and games; replaces a coffee table entirely in rooms under 250 square feet.
- Media console with enclosed shelving (Walker Edison, Sauder): holds the television, conceals media equipment, and provides 3 to 6 closed-door compartments for kid’s toys, gifts, and other items that need concealed storage.
- Storage bench with lift-top (Dorel Living): serves as seating at the entryway or foot of a bed while concealing 30 to 50 liters of interior storage.
- Bookshelf with lower cabinet doors (IKEA Besta): the lower half conceals items that do not benefit from display; the upper half holds books and decor.
Furniture that wastes space: decorative console tables with no storage, accent chairs that serve only seating, and coffee tables without shelves or drawers. In small living rooms, single-function furniture is a luxury the square footage cannot afford.
How Do You Organize Toys in a Shared Living Space?
Organizing toys in a shared living space requires a containment-first system with a defined toy zone boundary and a non-negotiable daily reset habit. The toy zone must be visible enough for children to access independently and contained enough that toys do not migrate across the room.
The most effective toy containment tools are lidded baskets and open-top rolling bins. Open-top bins allow children to retrieve and return toys without requiring adult help, which increases compliance with the reset routine. A rolling bin can be pushed to the storage zone in 10 seconds, which is the maximum friction threshold before a daily reset stops happening.
Limit the toy zone to one defined area — a corner of the living room with a rug boundary or a section of the media console’s lower shelf. When the zone is full, new toys require removing an equal volume of existing toys. The one-in one-out rule applied to kid’s toys, gifts, and seasonal items prevents the zone from expanding to consume the room.
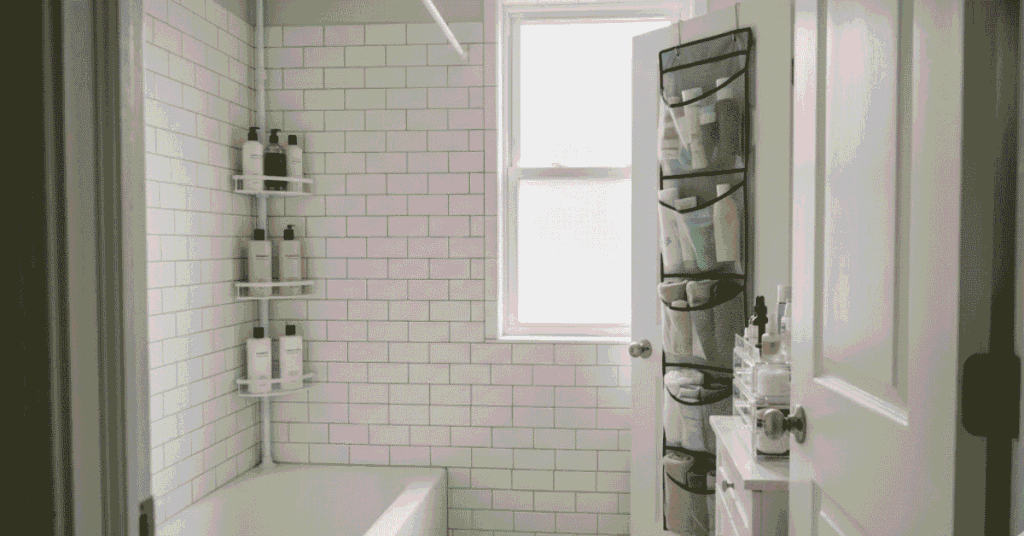
How Do You Organize a Small Bathroom Without Permanent Changes?
Organizing a small bathroom without permanent changes requires addressing four problem areas with damage-free solutions: the over-sink surface, the under-sink cabinet, the shower interior, and makeup and skincare storage. Each area has a distinct organizational challenge and a specific toolkit of renter-safe solutions.
The average U.S. rental bathroom measures 40 square feet (3.7 square meters), with limited counter space and no built-in storage beyond the vanity cabinet [site: U.S. Census Bureau, American Housing Survey]. Every storage solution must work within that footprint without adhesive damage to tiles, grout, or painted walls.
What Are the Best No-Drill Bathroom Storage Solutions?
The best no-drill bathroom storage solutions include over-door organizers and freestanding floor racks that exploit the bathroom’s vertical space without touching its tile, drywall, or painted surfaces.
9 no-drill bathroom storage solutions are listed below.
- Over-door towel rack (over-the-door hook bar): holds 2 to 4 towels on hooks that rest over the door top; no screws; supports up to 20 lbs (9 kg).
- Freestanding bathroom shelving unit (Zenna Home, Sauder): floor-standing 3 to 5 tier rack fits over toilet or beside vanity; no wall contact needed.
- Tension rod shelf unit (over-toilet): spring-tension legs press between floor and ceiling; 3 shelves provide 12 to 18 square feet of vertical storage.
- Suction cup organizers (iDesign or OXO): rated for 4 to 6 lbs (1.8 to 2.7 kg) on tile or glass surfaces; best for lighter items on shower walls.
- Over-door pocket organizer (mesh or clear vinyl): hangs on the back of the bathroom door; 12 to 24 pockets hold hair tools, skincare, and cleaning products.
- Countertop tiered organizer: freestanding 2-level tray holds 15 to 20 product bottles in the same footprint as 6 bottles placed flat.
- Freestanding toilet paper holder with shelf: replaces wall-mounted holders; holds 8 to 12 rolls and provides a side surface for one decorative or functional item.
- Magnetic cabinet door strip: adhesive-backed strip on the inside of the vanity cabinet door holds bobby pins, nail clippers, and small metal tools.
- Under-sink rolling cart (HOMFA, Honey-Can-Do): fits in the dead space beside the pipe column; 3 to 4 rolling drawers provide 12 to 16 liters of organized storage.
How Do You Organize Under the Sink Without Modifying Cabinets?
Organizing under the bathroom sink without cabinet modification involves building around the pipe column using stackable bins on each side and a tension rod across the back to create vertical hanging storage above the floor area.
A tension rod placed 8 to 10 inches (20 to 25 cm) above the cabinet floor, running side-to-side across the back, allows spray bottles and cleaning products to hang from their trigger handles. This frees the entire cabinet floor for stackable bins. Note the pipe clearance: the P-trap and supply lines typically consume 6 to 10 inches of the center column; all storage must work around this fixed obstruction.
Pull-out organizers (mDesign, Madesmart) slide on the cabinet floor without mounting. They extend 8 to 14 inches forward, bringing back-of-cabinet items to the door opening with a single pull. This eliminates the most common under-sink frustration: items stored at the back that require removing 6 items in front to access.
What Shower Storage Works Without Drilling Into Tile?
Shower storage options that require no tile drilling include tension pole caddies, suction cup organizers, and hanging shower caddies that attach to the shower head arm without wall contact.
- Tension pole shower caddy (Zenna Home, InterDesign): spring-loaded pole extends floor-to-ceiling between the shower floor and ceiling; holds 3 to 4 shelves; supports 15 to 25 lbs (6.8 to 11.3 kg); the most durable no-drill shower option for rentals.
- Shower head hanging caddy: S-hook attaches to the shower arm pipe; holds 3 to 5 bottles; zero wall contact; best for short-term renters or bathrooms with flat-wall tile that reduces suction effectiveness.
- Suction cup caddy (OXO, iDesign): attaches to tile or glass with silicone suction cups; holds 4 to 8 lbs when properly installed; reapply suction monthly to prevent failure.
Long-term testing however confirms that suction cup caddies fail faster than tension pole systems. Suction degrades in 3 to 6 months under daily humidity exposure. Tension poles hold for 2 to 5 years without adjustment. The cost difference is $15 to $25, which is the most cost-efficient upgrade a renter can make to shower storage.
How Do You Store Makeup and Skincare With Limited Space?
Storing makeup and skincare with limited counter space requires a purge-first step before purchasing any organizer — buying a 40-compartment acrylic organizer for a collection that should contain 15 products does not solve the storage problem, it launders it.
After the purge, three organizer formats handle the remaining collection effectively:
- Tiered countertop organizer (Muji acrylic, IKEA GODMORGON): 2 to 3 levels display product labels face-front within a single 6 x 6 inch countertop footprint.
- Drawer makeup insert (Alex Drawer organizer, Acrylic drawer dividers): converts a vanity or bathroom drawer into a flat-organized makeup zone where every product is visible without moving other products.
- Magnetic wall-mounted strip with metal tins: holds small metal containers of skincare tools and accessories on a vertical surface using adhesive-backed magnets; works on the inside of a cabinet door.
How Do You Set Up a Home Office in a Small Apartment?
Setting up a home office in a small apartment requires solving three challenges in sequence: selecting a surface that fits the available zone, establishing a visual boundary between the work area and the living area, and managing cable visibility so the workspace does not contaminate the room’s visual organization. Room size is irrelevant. A functional work setup occupies 18 to 24 inches of depth and 36 to 48 inches of width — dimensions that fit against a wall in any apartment bedroom or living room.
How Do You Create a Work-From-Home Setup in Limited Space?
Creating a work-from-home setup in limited space starts with selecting the smallest surface that accommodates the primary work task — a 48 x 24 inch (122 x 61 cm) desk covers laptop work, a monitor, and one notebook without consuming the room.
Steps to build a functional small-space home office:
- Choose the surface first: a foldable wall-mounted desk (IKEA NORBERG), a secretary desk that closes when not in use, or a narrow console table at desk height.
- Establish a visual boundary: a bookshelf beside the desk, an area rug beneath it, or a change in lighting overhead signals that this zone is functionally different from the surrounding room.
- Add task lighting: a dedicated desk lamp (BenQ e-Reading lamp, Elgato Key Light) at 4,000 to 5,000 lux separates the work zone from ambient room lighting and reduces eye strain during extended sessions [site: American Optometric Association, workplace lighting guidelines].
- Manage cables before they multiply: run cables the day the setup is built; retrofitting cable management into a completed desk setup takes 3x longer than building it in from the start.
What Desk Organization Strategies Save the Most Space?
The desk organization strategies that save the most space are vertical organizers and monitor risers with shelf space underneath — both exploit the air space above the desk surface rather than expanding the desk footprint horizontally.
- Monitor riser with drawer (VIVO, Flexispot): elevates the monitor to ergonomic height (eye level at 20 to 28 inches) while providing a 17 x 9 inch storage shelf and often a small drawer beneath; recovers 30 to 40% of desk surface area.
- Vertical desk organizer (Blu Monaco, Marbrasse): holds documents, notebooks, and stationery in a single 6-inch-wide tower rather than spreading them across the desk surface.
- Wall-mounted pegboard accessory panel (Command strip-mounted on a lightweight board): hangs scissors, headphones, a small shelf, and a cable clip board on the wall above the desk without drilling.
- Under-desk cable tray (J Channel, CableBox): mounts below the desk edge with adhesive strips; contains power strips and cable bundles out of sightline.
How Do You Manage Cables and Cords Efficiently?
Managing cables and cords on a small desk efficiently requires grouping cables by destination before buying any management product, because cable management that ignores cable routing creates tidy bundles that are still tangled behind the desk.
Cable management tools under $20:
- Velcro reusable cable ties (Amazon Basics, VELCRO Brand): group cables running to the same destination; $7 to $10 for 100 ties; reseal on adjustment.
- Adhesive cable clips (SOULWIT, Command cable clips): route individual cables along desk edges and legs; rated for 1 to 3 cables per clip; peel off without surface damage.
- Under-desk adhesive cable tray (J Channel cable raceway): sticks to the desk underside; holds the power strip and all cable bundles in one concealed channel; $12 to $18.
- Adhesive cable box (Bluelounge CableBox Mini): sits on the floor beneath the desk; conceals the power strip and excess cable lengths in a closed box; eliminates visible cable spaghetti at the floor level.
What Storage Products Actually Work in Small Spaces?
Storage products that actually work in small spaces are those that pass four criteria simultaneously: they fit the exact space without modification, serve more than one function, require no permanent installation, and scale up or down as storage needs change. Products that fail any one of these criteria create the illusion of organization while consuming money and space.
The small space storage market is saturated with products that photograph well and perform poorly. Evaluation must precede purchase. Every product acquisition should answer the same four questions before checkout. For a full room-by-room product breakdown organized by budget, the Cozy Sorted blog covers new reviews and renter-specific picks on an ongoing basis.
What Makes a Storage Product Worth Buying?
A storage product is worth buying when it solves a specific identified problem rather than a hypothetical future storage need. Buying organizers in advance of a declutter session guarantees buying for the wrong volume.
Evaluation checklist before purchase:
- Does it fit the exact measured space? Take measurements before adding to cart. A bin that is 1 inch too tall does not become useful.
- Does it serve more than one purpose? A storage ottoman that seats, stores, and functions as a coffee table justifies its cost and floor space. A decorative bin that only stores does not.
- Does it require drilling, adhesive, or a tool to install? If yes, evaluate the damage risk before committing.
- Is it stackable or expandable? A product that locks in a fixed configuration becomes obsolete if storage needs change.
- Does it come in a size appropriate to the room? A product scaled for a large closet placed in a small drawer wastes the drawer.
How Do Multi-Use Tools Like Tension Rods and Lazy Susans Help?
Tension rods and lazy Susans solve problems that standard storage products cannot because they reorganize dead space rather than adding new containers to existing space. Both are tools that change how existing space functions, not how much space exists.
Tension rods work in 5 specific applications that standard bins cannot replicate: as under-sink spray bottle hangers, as shower caddies, as drawer dividers between folded items, as curtain rods without drilling, and as cabinet shelf extenders for baking sheets and cutting boards stored vertically. The Container Store’s Elfa Closet system uses tension-based components for the same reason: tension creates mounting force without wall penetration.
Lazy Susans solve corner cabinet dead zones and fridge back-wall inaccessibility. A 12-inch (30 cm) rotating turntable in a corner cabinet brings every item at the back to the front in one rotation. The same turntable in the refrigerator reduces food waste by making every item retrievable without shifting containers in front.
When Should You Use Clear Storage vs. Opaque Bins?
Clear storage containers work best when the contents are accessed frequently and visual inventory matters — pantry staples, refrigerator bins, under-sink cleaning products, and bathroom skincare all benefit from visibility because the inventory changes regularly.
Opaque bins work best when contents are seasonal, archived, or stored out of sightline. A closed white bin on an open shelf reads as a clean design element. A clear bin on the same shelf displays its contents to the room, which requires those contents to be visually tidy at all times. On open shelves visible from the living area, opaque bins reduce visual noise and create the perception of calm that cluttered clear bins undermine.
The decision rule: clear for inside cabinets and drawers, opaque for open shelves and visible storage. Apply this consistently and the result is a system that is functional from the inside and visually restful from the outside.
Which Over-Door Organizers Work Best?
The over-door organizers that work best depend on the room and door type, with mesh pocket organizers performing best in bathrooms and bedrooms and hook-bar systems performing best in entryways and kitchens.
Room-by-room breakdown:
- Bathroom door: over-door pocket organizer with clear vinyl or mesh pockets; holds 20 to 36 items; best for products accessed daily without needing to open the organizer.
- Bedroom door: over-door hook bar (Yamazaki Home, Simple Houseware) for bags and robes; over-door shoe organizer for accessories and small folded items.
- Kitchen cabinet door: wire over-door rack for foil, wrap, and bag boxes; fits inside the cabinet door without protruding past the door frame when closed.
- Pantry door: tiered over-door pantry organizer (Lynk Professional) with 4 to 6 adjustable shelves; holds 30 to 50 spice jars, cans, and small boxes.
- Entryway coat closet door: heavy-duty over-door hook bar rated for 25 to 50 lbs; handles coats, bags, and umbrellas. Door organizers with hooks require no permanent installation, making the back of every door a functional storage surface rather than wasted real estate.
What Storage Products Should You Avoid?
The storage products that waste money in small spaces are those that consume more space than they create, are purchased without measurement, or address problems the buyer does not actually have.
8 storage products to avoid in small apartments are listed below.
- Large matching bin sets purchased in advance of decluttering — buying 12 identical bins before knowing what needs to be stored guarantees owning 6 bins with no purpose.
- Multi-tier shoe towers without measuring — many models require 15 inches (38 cm) of depth; standard closet floors offer 12 inches; the unit does not fit.
- Decorative baskets without lids for daily-use storage — open baskets create visual clutter faster than they contain it when contents are irregular shapes.
- Single-purpose small appliance organizers — a dedicated stand mixer lift costs $50 and solves one problem; a $10 shelf riser solves the same problem.
- Rotating closet carousels — require ceiling mounting; not renter-compatible; the installation cost exceeds the organizational benefit.
- Storage ottomans with hinged lids and no interior organization — interior without dividers becomes a black hole for items that never get retrieved.
- Hanging closet organizers wider than the closet rod length — an organizer that overhangs the rod buckles under weight and reduces the adjacent hanging space.
- Stackable bins without interlocking mechanisms — bins that do not lock together tip when stacked above 3 units; they are not stackable in any meaningful functional sense.
How Do You Decorate a Rental Apartment Without Losing Your Deposit?
Decorating a rental apartment without losing the deposit requires building a complete decor system from four renter-safe tools: Command strips, removable wallpaper, tension rods, and peel-and-stick tiles. Every visual transformation in this system is reversible in under 2 hours at move-out. None requires spackling, repainting, or landlord remediation.
Security deposits average one to two months’ rent in most U.S. states, meaning a $1,500 monthly apartment carries a $1,500 to $3,000 deposit at risk [site: HUD.gov, security deposit regulations by state]. The cost of damage-free decoration tools is $50 to $300. The math requires no interpretation.
What Is the Damage-Free Decoration Toolkit for Renters?
The damage-free decoration toolkit for renters includes Command strips, removable peel-and-stick wallpaper, tension rods, and adhesive-backed hooks as the four foundational tools that enable a complete apartment transformation without permanent modification.
8 essential tools in the renter decoration toolkit are listed below.
- Command strips (3M): rated for 1 to 16 lbs (0.45 to 7.3 kg) depending on strip size; remove cleanly from painted drywall, tile, and most smooth surfaces; the definitive renter wall-mounting solution.
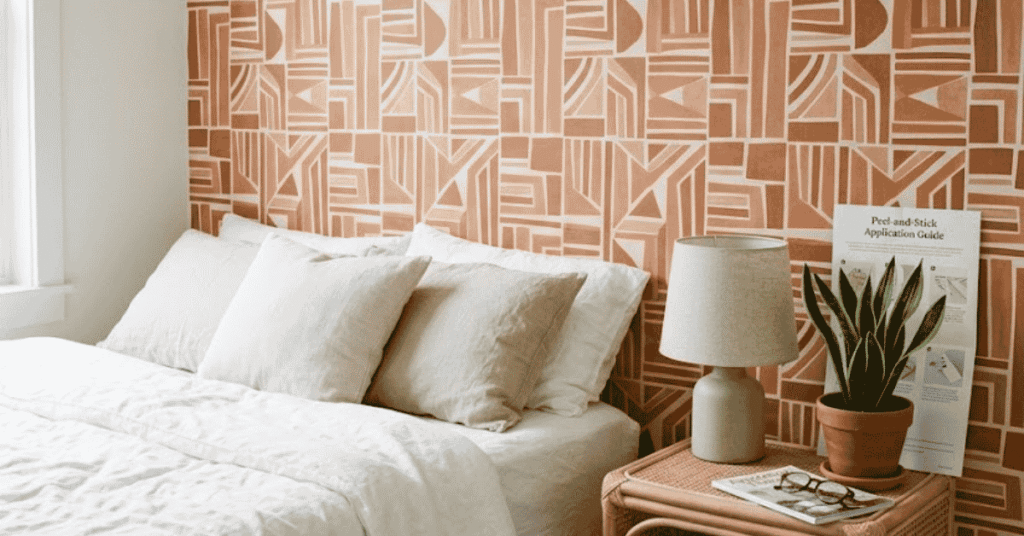
- Removable peel-and-stick wallpaper (Tempaper, Chasing Paper, RoomMates): applies to primed painted walls; removes without residue up to 2 years after installation; transforms accent walls, cabinet interiors, and stair risers.
- Tension rods: install without screws in any window frame, cabinet opening, or room corner; supports curtains up to 20 lbs (9 kg) on heavy-duty models.
- Peel-and-stick backsplash tiles (Aspect, Tic Tac Tiles): apply over existing tile or painted drywall; remove cleanly; transform a rental kitchen backsplash in 2 to 3 hours.
- Adhesive picture hanging strips (Command Picture Hanging Strips): hold frames up to 16 lbs without nails; the strongest available renter-safe frame mounting system.
- Adhesive LED strip lights (Govee, Philips Hue): backlight furniture and shelves; peel cleanly from painted surfaces; add accent lighting without electrical modification.
- Peel-and-stick floor tiles (Smart Tiles, FloorPops): lay over existing hard flooring without adhesive residue; transform bathroom or kitchen floors in one afternoon.
- Freestanding room divider panels: create visual separation between zones without touching walls or ceilings.
How Do Peel-and-Stick Solutions Transform a Space?
Peel-and-stick solutions transform a rental space by replacing fixed surface finishes with removable visual layers that change the perceived design language of a room without altering its underlying structure. A white wall with peel-and-stick geometric wallpaper reads as a designed space. The same white wall with nothing applied reads as a generic rental.
Removable wallpaper products from Tempaper and Chasing Paper apply to flat-painted walls in rolls 20 to 24 inches wide. A single accent wall requires 2 to 3 rolls ($65 to $120 total) and 2 to 3 hours to install. The removal process involves peeling from a corner at a 45-degree angle; most products remove cleanly from latex-painted surfaces within 1 to 2 years of installation.
Peel-and-stick backsplash tiles handle the kitchen transformation specifically. Products from Tic Tac Tiles apply over existing tile and hold for 3 to 5 years under normal kitchen humidity conditions. At move-out, they peel from the tile surface in full panels. Note that these products are not rated for surfaces above 80°C (176°F), which means installation directly behind the stove burners requires a heat-rated alternative.
How Do You Hang Wall Decor Without Nails?
Hanging wall decor without nails in a rental requires matching the Command strip weight rating to the frame weight before installation — the most common Command strip failure mode is exceeding the rated load, not adhesive failure on clean surfaces.
Methods for nail-free wall decor:
- Command Picture Hanging Strips: paired adhesive strips connect frame to wall; 4 pairs hold up to 16 lbs; rated for frames up to 24 x 36 inches.
- Command Poster Strips: lightweight solution for paper prints and canvas; holds up to 1 lb per strip set; 4 strips hold most standard poster sizes.
- Leaning art display: frames and canvas panels leaned against the wall on a shelf or floor ledge require zero wall contact; styling principle used in interior design magazines consistently.
- Floating adhesive shelves (IKEA LACK with Command strip modification): a shelf holds a series of framed photos rather than mounting each independently; one shelf installation carries 10 to 15 frames at the adhesive cost of one mounting point.
- Gallery wall with Command strips: a curated grid of frames in 3 to 5 sizes creates a designed wall installation; plan the layout on the floor before mounting to avoid repositioning on the wall.
How Do You Hang Curtains Without Drilling?
Hanging curtains without drilling into walls is possible using tension rods for lightweight curtains and adhesive curtain rod brackets for heavier panels, with the choice determined by curtain weight and window frame depth.
Tension rods work in windows with a flat interior frame recess of 2.5 to 10 inches (6 to 25 cm) depth. They support curtain panels up to 8 lbs (3.6 kg) per rod on standard models and up to 20 lbs (9 kg) on heavy-duty models with rubber end grips. They are the fastest installation method: 60 seconds per window.
Adhesive curtain rod brackets (Command Clear Large Hook or specialty curtain bracket sets) mount to the wall surface outside the window frame and hold a standard rod. They support panels up to 12 to 15 lbs when applied to clean painted drywall per manufacturer instructions [site: 3M Command, product weight ratings]. This method creates the look of a conventionally mounted rod without a single screw.
For blackout curtains, which average 12 to 20 lbs per panel pair, neither tension rods nor Command brackets provide reliable long-term support. In this case, negotiate a curtain rod installation with the landlord as a pre-approved modification with your own removal at move-out.
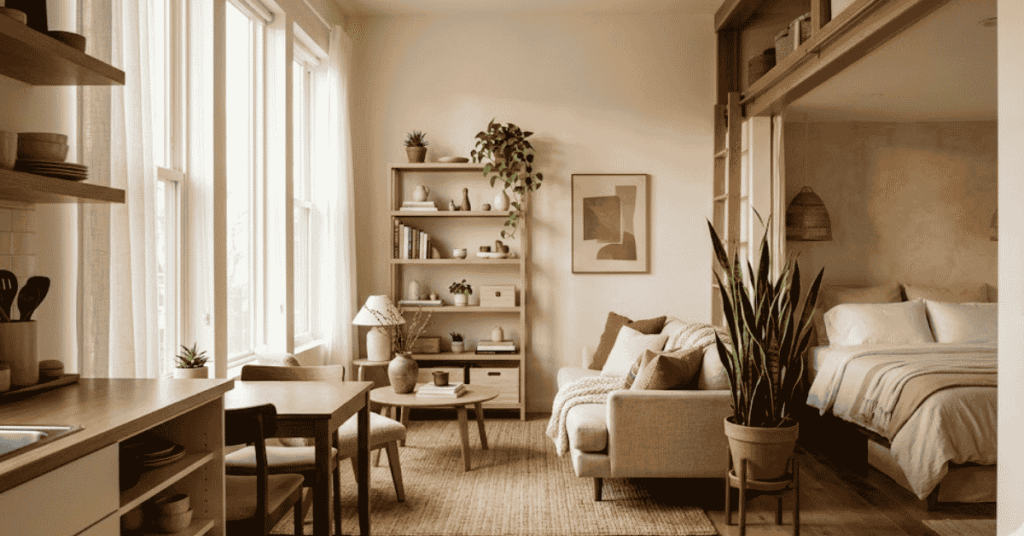
How Do You Add Personality to a Neutral Rental?
Adding personality to a neutral rental starts with layering textiles, plants, and removable wallpaper across the room’s surfaces in a deliberate sequence rather than adding individual items without a cohesive visual system. White walls with flowy linens, a large area rug, and one statement plant already read as a designed space. The same white walls empty read as a vacant unit.
The layering sequence: area rug first (it anchors the room’s color and scale), textile layer second (throw pillows, curtains, bed linen that carry the room’s secondary color), plant layer third (1 to 3 plants of varying height), and art and decor fourth. Each layer adds visual depth before the next is introduced.
Aesthetic styles that work structurally in small rentals: cozy minimalist (limited items, high quality textiles, natural materials), Scandinavian (white base, wood tones, functional objects as decor), and boho layered (mixed textiles, plants, natural baskets). Cottagecore works in small spaces when plant count and textile layering are scaled to room size. Maximalist approaches work only when every visible item is intentional. Whole dark colors make small rooms feel smaller at low light but can succeed with adequate window light and reflective surfaces.
What Floor Covering Options Work for Rentals?
The floor covering options that work for rentals include area rugs, peel-and-stick floor tiles, and interlocking foam tiles — each suited to a different floor condition and renter permanence situation.
- Area rugs: the most versatile and universally renter-approved option; cover stained, scratched, or aesthetically mismatched flooring without adhesive contact; move at no cost; sizes range from 2 x 3 ft accent rugs to 9 x 12 ft room-scale options.
- Peel-and-stick floor tiles (FloorPops, Smart Tiles): apply to hard, clean, dry subfloor surfaces; cover vinyl, laminate, and tile; remove without adhesive residue within 12 months on most surfaces; cost $1.50 to $3.50 per tile, or $50 to $100 for a bathroom floor.
- Interlocking foam tiles (Greatmats, IncStores): connect without adhesive; remove and store flat; best for exercise areas, children’s play zones, and basement-level apartments with cold concrete floors.
How Do You Do a Budget Room Makeover in a Small Apartment?
A budget room makeover in a small apartment requires prioritizing the highest-visual-impact changes within a defined spending ceiling before purchasing any single item. Buying individual items without a total budget produces $300 in spending on a $100 room problem. The three budget tiers below cover the full range of small apartment makeover scenarios.
What Can You Upgrade for Under $50?
For under $50 you can realistically upgrade the visual quality of one room with 5 targeted purchases that address the highest-impact areas: textiles, lighting, organization, and one statement item.
Highest-impact changes within a $50 budget:
- One area rug (Amazon Basics, Walmart Mainstays, 4 x 6 ft): $20 to $35; anchors the room and covers floor imperfections.
- Command strip gallery wall (3 to 5 frames from IKEA RIBBA): $8 to $15 for frames; $5 for Command strips; transforms a blank wall.
- One large plant (pothos, snake plant, or monstera from a local nursery): $8 to $18; adds organic height and visual complexity.
- Throw pillow covers in a coordinating color (Amazon, H&M Home): $6 to $12 for two covers; updates sofa or bed visual with no furniture purchase.
- LED strip lights (Govee, $10 to $15): add accent lighting behind a TV or under a bed frame; shift the room’s evening atmosphere in 15 minutes.
What Can You Achieve With a $100 Budget?
With a $100 budget you can achieve a full room transformation that addresses furniture, lighting, textiles, and storage simultaneously through coordinated spending across 6 to 8 products.
Full room transformation checklist at the $100 price point:
- Area rug (5 x 7 ft, Amazon or Ruggable): $40 to $55; the single highest-return investment in a small room refresh.
- 2 throw pillow covers + 1 throw blanket: $18 to $25 combined; complete the sofa or bed textile layer.
- Freestanding drawer organizer or shelf insert: $10 to $15; solve one persistent clutter problem at the same time as the aesthetic refresh.
- Plant and basic ceramic pot: $12 to $18; a fiddle leaf fig or rubber plant in a 6-inch (15 cm) pot adds a designed-feeling element at low cost.
- Command strip gallery wall with 3 coordinated frames: the remaining $10 to $15 covers 3 IKEA frames and a pack of Command strips.
The cumulative effect: the room has an anchoring rug, coordinated textiles, a living element, a curated wall, and a resolved organizational problem. At $100, this is the maximum transformation yield available without furniture replacement.
How Do You Compare Budget vs. Premium Decor Options?
The comparison between budget and premium decor options shows that premium spending pays off in textiles, storage systems, and lighting, but not in bins, hangers, or decorative accessories where budget equivalents perform identically over the same 2 to 3 year period.
| Category | Dollar Store / DIY | Amazon Mid-Range ($10-$25) | IKEA | Premium ($50+) |
| Storage bins | Adequate for light items; warp in 12 months | Best value; durable 3-5 years | Consistent quality at IKEA price | No meaningful advantage over mid-range |
| Textiles (rugs, pillows) | Poor durability; fades in 6 months | Functional; limited design range | Best value design quality in this tier | Worth it for high-traffic rugs (Ruggable, Loloi) |
| Drawer organizers | Functional short-term | Expandable bamboo outperforms all cheaper options | Competitive with Amazon at similar price | Custom wood inserts justify cost only in permanent kitchens |
| Lighting | Not applicable | Govee and Philips Hue entry-level strong performers | RANARP and HEKTAR outperform their price | Elgato and BenQ justify cost for daily work-from-home setups |
What Are the Best Secondhand Decor Finds?
The best secondhand decor finds for renters come from Facebook Marketplace, thrift stores (Goodwill, Salvation Army), and OfferUp — three platforms where furniture, mirrors, and textiles sell at 10 to 30% of retail price due to seller urgency rather than product defect.
Highest-value secondhand categories:
- Mirrors: retail $80 to $300; thrift store price $5 to $40; one oversized mirror transforms a room’s perceived size.
- Solid wood furniture: tables, side tables, nightstands, and bookshelves in solid wood outlast their flat-pack equivalents by decades; available on Marketplace for $20 to $80.
- Area rugs: gently used rugs sell for $20 to $60 on Marketplace; clean with a carpet shampooer ($20 rental) before use.
- Art and frames: original prints and vintage frames at $2 to $15 each; a curated set of 5 creates a gallery wall that reads as intentional.
- Lamps: base and shade sold separately allow mixing; $8 to $25 for a lamp base in working condition with a new $12 shade creates a $200-looking result.
How Do You Upcycle Furniture on a Budget?
Upcycling furniture on a budget involves painting, replacing hardware, and applying adhesive contact paper as the three accessible methods that produce the highest visual change per dollar spent.
- Painting: a $15 can of chalk paint (Annie Sloan, Rust-Oleum Chalked) transforms laminate or wood furniture without sanding; apply two coats, seal with wax; total cost $20 to $35.
- Hardware replacement: replacing drawer pulls and door knobs on a dresser or cabinet costs $15 to $40 for a full set; it produces a furniture piece that reads as new without touching the surface.
- Adhesive contact paper (d-c-fix, Con-Tact Brand): covers laminate and particleboard surfaces in faux wood, marble, or solid color; costs $15 to $25 per roll; the most underused upcycling tool in small apartment decor.
Secondhand pieces worth the most upcycling investment: solid wood dressers with working drawers, laminate side tables with intact surfaces, and wooden chairs with sound joints. Avoid upcycling pieces with structural damage, non-functional drawers, or water-damaged particle board — these do not hold paint or contact paper reliably.
How Do Color, Light, and Layout Make a Small Space Feel Bigger?
Color, light, and layout are the three zero-cost or low-cost visual tools that increase perceived room size without changing a room’s physical dimensions. Each operates on a different perceptual mechanism: color changes how the eye reads boundaries, light changes how the brain interprets depth, and layout changes how the body and eye move through space.
A 400 square foot apartment that uses all three tools correctly feels 20 to 30% more spacious than the same apartment that ignores them [site: Environmental Psychology research, Mehta and Zhu, Journal of Consumer Research]. No storage product or furniture purchase produces that result.
Which Colors Make a Small Room Look Larger?
The colors that make a small room look larger are light-reflecting neutrals in the white, off-white, cream, and pale grey range — specifically colors with a Light Reflectance Value (LRV) above 70 on the Munsell scale [site: Paint Quality Institute, LRV color specifications].
- Benjamin Moore Chantilly Lace (OC-65): LRV 92.2; the closest to true white without cold undertones; works in north and south-facing rooms.
- Sherwin-Williams Alabaster (SW 7008): LRV 82; warm white with yellow undertone; avoids the sterile appearance of pure white in rooms with limited natural light.
- Pale greige (Benjamin Moore Pale Oak OC-20, Agreeable Gray SW 7029): reads as neutral; reflects light without the starkness of white walls.
Whole dark colors make rooms feel smaller in rooms under 150 square feet unless offset by high-gloss finishes, large mirrors, and abundant natural or artificial light. A deep navy or forest green accent wall in a large-windowed room with a white ceiling and white flowy linens can create the illusion of depth. The rule is not “no dark colors” — it is “dark colors require light compensation.”
Where Should You Place Mirrors for Maximum Effect?
Mirrors have maximum spatial effect when placed opposite or adjacent to the primary light source — a window or a lamp — so the mirror reflects light back into the room rather than reflecting an adjacent wall.
Placement rules:
- Opposite a window: captures natural light and doubles its reach into the room; the most powerful single mirror placement in a small space.
- At eye level on a narrow wall: a tall narrow mirror on the shortest wall of a rectangular room extends the perceived length of that wall.
- Full-length on the back of a door or closet: adds a full vertical reflective surface without consuming floor space or wall area.
An oversized mirror (24 x 36 inches or larger) outperforms a cluster of small mirrors in a small room because one large reflective surface reads as a window. Multiple small mirrors read as decoration, not as spatial expansion. The use of double duty furniture — a storage ottoman with a mirrored top, a wardrobe with a mirrored door panel — integrates mirror function into furniture that earns its floor space on other grounds.
How Does Lighting Impact Space Perception?
Lighting impacts space perception by creating depth through layered sources at multiple heights, which makes a room’s volume feel three-dimensional rather than flat. A single overhead light illuminates a room uniformly and flattens it. Layered lighting produces shadows and gradients that signal depth to the visual cortex [site: Journal of Environmental Psychology, lighting and spatial perception research, 2021].
Three-layer lighting system for rentals:
- Ambient layer: the overhead fixture; replace the bulb with a 2700K to 3000K warm white LED at 800 to 1000 lumens to shift from clinical fluorescent light to a residential quality.
- Task layer: a dedicated desk lamp or under-cabinet light at the specific work surface; separates functional zones visually.
- Accent layer: a floor lamp behind the sofa, LED strips behind the TV, or a table lamp on a nightstand; these light sources at lower heights create the shadow gradient that makes a room feel dimensional.
Renters can implement all three layers without electrical modification. Every fixture in the system plugs into a standard outlet.
What Furniture Layouts Make a Room Feel Open?
The furniture layouts that make a small room feel open include floating furniture away from the walls by 2 to 4 inches (5 to 10 cm), which contradicts the common instinct to push everything to the perimeter to create a central open space.
Pushing furniture to the walls actually makes a room feel smaller by creating a visual “frame” around an empty center. Floating furniture slightly forward creates depth on all sides, which signals spatial generosity to the eye. A sofa 3 inches (7.5 cm) from the wall reads as placed, not crammed.
Additional layout principles that open a small room:
- Use leggy furniture (sofas on visible legs, dining tables with tapered legs, nightstands on hairpin legs): visible floor beneath furniture increases the perceived floor area.
- Avoid blocking natural light paths: no furniture taller than 36 inches (91 cm) placed in front of a window.
- Use one large rug rather than multiple small ones: one rug that contains the seating group reads as spacious; two small rugs read as fragmented.
- Choose one statement piece over many similar-scale pieces: one large pendant light, one large mirror, one oversized sofa; scale contrast creates visual hierarchy that makes space feel designed.
How Do You Maintain an Organized Small Home Long-Term?
Maintaining an organized small home long-term requires three components working simultaneously: a daily tidying habit that prevents accumulation, a one-in one-out rule that prevents volume increase, and a periodic reassessment that catches system failures before they compound. An organization system built without these three maintenance mechanisms degrades to its original state within 60 to 90 days [site: NAPO, organization system longevity research, 2022].
What Is the One-In One-Out Rule?
The one-in one-out rule means every item that enters the home requires an equivalent item to leave, applied at the point of acquisition rather than during a periodic declutter session. This rule enforces storage capacity as a hard limit rather than a soft guideline.
Application in a small space where storage is at capacity: when a new kitchen tool is purchased, an existing tool of equivalent size leaves through donation or discard before the new item is put away. The rule applies to clothing (one new garment, one donated garment), kitchen tools, home decor, and books — the four categories where small apartment storage fills fastest.
The categories where it matters most: clothing, because wardrobes expand faster than any other category; kitchen tools, because specialty gadgets accumulate without use-frequency scrutiny; and home decor, because decorative acquisitions displace functional items from limited surface space. Intentional buying is the outcome the rule produces — not restriction, but conscious exchange.
How Do You Build Daily Habits That Prevent Clutter?
The daily habits that prevent clutter from returning in a small home are a 10-minute morning surface reset and a 5-minute evening return routine — together 15 minutes per day against an average 67 hours per year lost to clutter-related search and reorganization.
Daily habits that take under 15 minutes total:
- Morning: clear all horizontal surfaces before leaving any room — counters, the coffee table, the desk surface, and the bathroom counter reset to their cleared baseline.
- Evening: return every displaced item to its assigned home — items left on surfaces overnight are tomorrow’s clutter foundation.
- One load of dishes completed before bed: a clean sink reset eliminates the kitchen’s fastest clutter source.
- Bags, shoes, and outerwear returned to the entryway zone rather than placed on the nearest chair or floor.
- One shelf or drawer straightened per day on rotation: 5 minutes per day maintains every drawer in the home across a 2-week cycle without a single dedicated organization session.
When Should You Reevaluate Your Organization System?
You should reevaluate your organization system when the system stops producing its intended outcome — items are not returning to their designated locations, storage is at capacity, or daily retrieval takes more than 30 seconds per item.
Trigger events that require reassessment:
- Moving to a new apartment: every system built for the previous layout requires rebuilding for the new one; direct transplant of organizers and zone assignments without re-measurement fails within weeks.
- Life change: a new partner, a new child, a new work-from-home arrangement, or a new hobby introduces a category of items that the existing system was not designed to hold.
- Seasonal shift: a system that works in summer without winter coats, boots, and seasonal gear requires adjustment when those items reenter the home.
- New purchase category: acquiring 50 books when the system contained 10, or adding cooking equipment that doubles the kitchen tool count, exceeds the current system’s capacity and requires a zone redesign.
- System stops working: if items are consistently not returning to their assigned homes, the system is misaligned with actual behavior — not the people using it. The system needs adjustment, not the people.
Should You Use External Storage for a Small Apartment?
External storage for a small apartment makes sense in a narrow set of legitimate use cases and signals a need for deeper decluttering in all other cases. A storage unit rented to house items that could be discarded is a monthly fee paid to avoid a one-time decision. The fee compounds indefinitely.
The storage unit decision is a last resort with defined conditions, not a standard solution for small space overflow.
When Does a Storage Unit Make Sense?
A storage unit makes sense for a renter when the items being stored have legitimate future use that justifies the ongoing monthly cost against an explicit timeline.
Legitimate storage unit use cases:
- Seasonal gear with no apartment storage: ski equipment, surfboards, camping gear, and bicycles used 2 to 4 times per year justify off-site storage when apartment space is below 500 square feet.
- Business inventory: products, supplies, or equipment related to a home-based business that exceed apartment capacity without an office alternative.
- Transitional life periods: a lease gap between apartments, a temporary relocation, or a move in progress that requires bridging storage for 1 to 4 months.
- Inherited items awaiting distribution: estate items being held temporarily while family members arrange retrieval.
Items that do not justify a storage unit: furniture too large for the apartment, clothing not currently fitting, books not being read, and sentimental items that feel too guilt-inducing to donate. These are declutter decisions dressed as storage problems.
What Are the Hidden Costs of Storage Units?
The hidden costs of renting a storage unit include insurance, access fees, and the compounding psychological cost of deferred decisions that grow more expensive to resolve the longer the unit is held.
Storage unit costs beyond the monthly fee:
- Monthly rent: averages $90 to $300 per month (5 x 5 ft to 10 x 10 ft units) across U.S. markets [site: SpareFoot Storage Beat, national average storage unit costs, 2023].
- Contents insurance: most facilities require renter’s insurance or an in-house policy at $10 to $25 per month; items are not covered by the facility’s own insurance.
- Access fees: climate-controlled facilities in urban markets charge $5 to $15 per access for after-hours retrieval; standard access during limited facility hours creates retrieval friction.
- Forgotten inventory cost: items stored longer than 6 months have a documented retrieval rate below 20%; the remaining 80% is paid storage for items that will not be used [site: Self Storage Association, utilization research].
- Annual rate increases: most storage facility contracts include a 3 to 8% annual price escalation clause; a $100 unit costs $125 to $150 in 3 years without renegotiation.
Should You Invest in a Closet System as a Renter?
Investing in a closet system as a renter makes sense when the lease term is 18 months or longer, the closet is larger than 24 square feet (2.2 square meters), and the system is freestanding rather than wall-mounted.
The decision framework: a freestanding modular system (IKEA PAX wardrobe, Elfa freestanding unit from Container Store, ClosetMaid modular tower) moves with the renter at the end of the lease. It does not constitute a permanent modification. A wall-mounted bracket system requires installation, removal, patching, and repainting at move-out — a $150 to $400 restoration cost that erases most of the system’s organizational value.
The Container Store’s Elfa Closet freestanding system starts at $300 to $600 for a standard reach-in configuration. IKEA PAX wardrobe systems start at $150 for a single unit and scale to full walk-in configurations at $600 to $1,200. Both are renter-compatible whenfreestanding. Both become permanent modifications when wall-anchored. The distinction determines whether the investment is recoverable at move-out.
For the most comprehensive breakdown of closet systems by price and configuration, along with no-dresser alternatives tested in real rental closets, see the full guide on organizing a small closet without a dresser.